Follow Us

Soap Warehouse Blog

How to use a Spill Kit

Posted by Linda Chambers on Wed, Jan 25, 2017 @ 10:27 AM

This is the last of my series on Spill Kits. I have told you why you need one, how to put together one your self and now we get to the part of actually using them.

Here are the steps you need to take when you see or are made aware of a chemical spill:

1. Is the spill still happening? Ex: a value is open and chemical is spilling out, a barel tipped over and contents still inside is still flowing. Safely stop the flow first. Put on gloves if needed and stop the flow.

2. Has someone been injured by the spill? If Yes open the nearest Spill Kit, put on PPE and remove the victim. If no victim or if someone else can handle their care go to the next step.

3. Determine what has spilled; look at the container it came from, look for labels. If you know what it is and what spill kit to use move on. If not then start with a Universal or General kit until you learn otherwise. If you can identify it but do not actually know how to handle this chemical, go get the SDS and check it for what PPE and clean up measures it tells you.

Types of Spill kits.png

4. Once you know what it is and which type of Spill Kit to use if you have not already needed to open the kit now and put out the safety measures to keep others out of and away from the spill. Enlist others to do this if possible so you can get right to the spill.

5. Put on all needed PPE if you haven't earlier. If the spill is large, and more than one set of PPE is included and someone else is available have them get ready to help you.
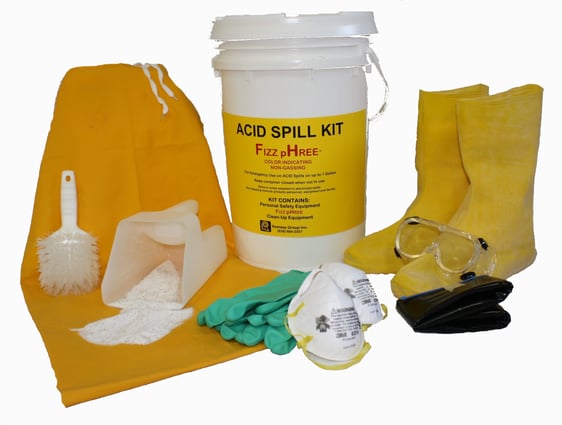
acid spill kit.jpg

6. Contain the spill with supplied barriers; socks, booms, sand, drain covers, etc. Start with the highest hazard. ex: spill running toward a drain, electricity, road, stream, down a hill, etc. Choose the best route for cleanup according to the surroundings of the spill.
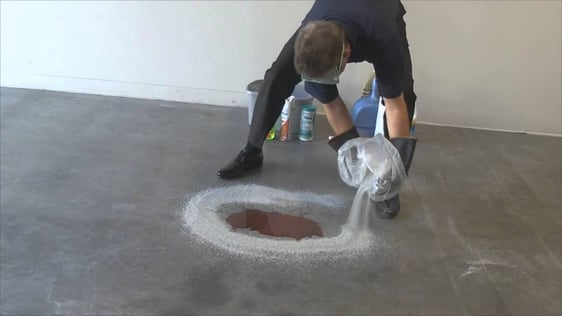
Using a spill kit.jpg

7. Once contained, meaning the spill can not get bigger, neutralize if needed. Ex: if it is an acid or corrosive. 

8. Once neutralized start to apply absorbent materials; pads, pillow, sand or other loose absorbents. Work from the outside edge inward. Continue until you have used enough to absorb all of the liquid or you have run out. If you have exhausted your supply and you still have a center of liquid move or put down barriers at the edge and start removing the absorbed materials while more supplies are found or until official first responders can get there.
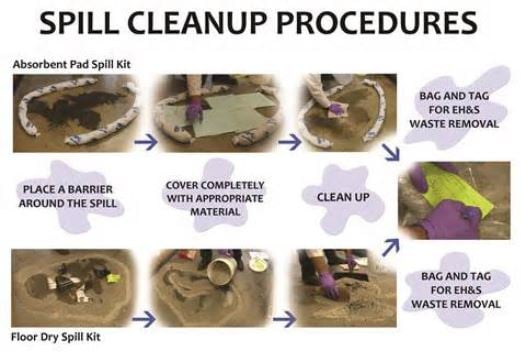
Spillcleanupchart.jpg

9. Clean up using broom and pan, shovel or other supplies and empty into a clearly marked as hazardous, approved container for removal; bags, bucket, pail, etc.
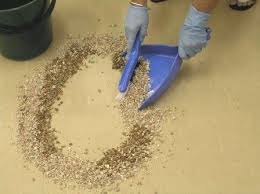
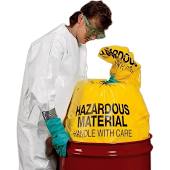
SweepUpSmall.jpgPuttingHWintobags.jpg

10. Clean spill area once cleared of spill with regular cleaning supplies; mop, neutral cleaner, sponges, etc. and discard them as well as they could still have traces of hazardous chemicals on them. You want to clean with a neutral cleaner so you don't have any chemical reactions with the residue from the spill.

11. Once cleaned and dry, remove all warning safety measures you had set out.

12. Immediately restock Spill Kit or replace with a new one until you can resupply.
Tags: safety, chemical safety, spill kit

DIY Spill Kits, all you need to know.

Posted by Linda Chambers on Wed, Jan 18, 2017 @ 12:42 PM

Any contractor that works with and transports hazardous chemicals needs to also have with each vehicle that contains these hazardous chemicals a chemical spill kit to comply with OSHA standards.

Most contractors are unaware that they need to have or how to use a spill kit. Just like many do not have or carry fire extinguishers. But OSHA has standards for the safety of the employees and the public at large when it pertains to hazardous chemicals.

I spoke in my last post on what OSHA says what a spill kit is and what has to be in a spill kit, and in fact they are pretty vague on a number of points but I will not go back over them, just please visit that post.

Now as I said in my last post you can buy ready made kits but I will show you how you can make your own DIY for many times much less and still be within the guidelines.

Here again is the list of required items for a spill kit:

A warning measure; A frame floor sign, caution tape, cones, etc.

PPE for at least one person effective to protect them from the spill during removal. Gloves, glasses or goggles, mask, shoe covers, etc

A physical barrier to place around the spill to contain it, which may or may not also absorb, OSHA does not say it has too. Can be berms, bumpers, drain covers, even sand.

Absorption materials; Sand, clay, pads, mats, etc.

Removal equipment; broom, shovel, waste pan or scoop

Removal containers; can be the spill kit container itself, bags or other approved container.

Products to clean the area once the spill has been removed. Such as a mop, cleaner, sponges.

And that is it.

If you can not reasonably carry a kit large enough to handle all the chemicals on your own you at least need to have available enough to lessen a spills impact before the proper first responders and hazdardous material removal teams can get there. 

This could include using materials to contain as much as possible, block or close off storm drains, prevent running across a road, traveling into a waterway, etc.

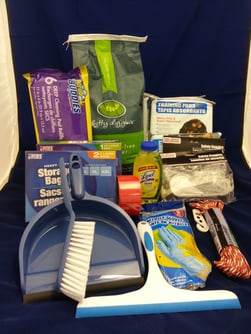
Here is what I bought and put into my own DIY 5 gallon spill kit:

I used a white cleaned out 5 gallon UN approvel pail. Make sure it only contained as near neutral a soap as possible but a pail from something else like a Firehouse Pickle pail can be fine too, plus it is already red, or an orange Home Depot pail.

I wanted my kit to supply two people to use as a Universal Kit that could take care of a 5 gallon size spill.

Here are items I picked up at the Dollar Tree: a bag of cat litter, pack of 5 puppy training pads, 2 pair of safety googles, a plastic dust pan with sweep brush, a small sqeege, pack of 8 Nitrile gloves, a red and white clothes line (to use to rope off spill area) Bright red tape, Heavy weight zip storage bags, a small bottle of Lysol disinfectant cleaner, a pack of 6 absorbant pads. $11.00

2015-03-18 11.12.14.jpg2015-03-18 11.24.38.jpg

A stop at a Dollar Store for large sponges and zip ties, $4.00+ some change.

Then I went to Home Depot and got:

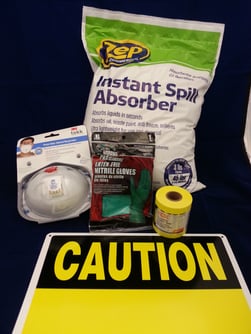
A two pack of N95 masks, a roll of caution tape, a caution sign (to hang on the rope), one pair of heavier Nitrile gloves if needed, and a 3 lb bag of Zep instant spill absorber and one bag of play sand. This was my most expensive stop and not all of the supplies are all going in. $32.00

Plus a few items I had lying around the house so they were at no cost. Total still under $50 unless you have to buy the pail, which I did not.

Here is how I put it together:

Got the pail clean and ready by labeling for the type, Universal and amount of chemical it should treat, 5 gallons.

Put the items you will use last in the bottom, fill up until what you will need first on top. 

So cleaning items in first: Lysol, sponges.

Then the disposal items: marked hazardous bags, extra zip ties.

The disposal removal items: broom and pan

The absorbant materials: the pupply pads, cat litter I had poured into an empty quart milk jug and marked with permanent marker, 2 Heavy zip bags filled with the Zep absorbor material about 1 lb each. 

Containment materials; Two homemade berm socks made from the cut off legs of a pair of knit tights fiiled with sand and tied closed. And another quart milk jug filled with more loose sand to use if the socks are not enough.

PPE next: Masks, Gloves and goggles all in their own baggies so you open only what you need.

Warning measures on top: Sign, caution tape and rope.

And that completes the kit.

If you would like a copy of my e-book How to make your own OSHA Spill Kit, email me at lchambers@georgiachemical.com

Next Post: How to use the kit to clean up a spill.


Tags: chemical safety, spill kit

PWNA 2014

Posted by Linda Chambers on Tue, Nov 18, 2014 @ 01:56 PM

Although it was a little later in the year for the annual Power Washers of North America convention, so that it could coinside with CETA in Orlando, FL, it was a good event.

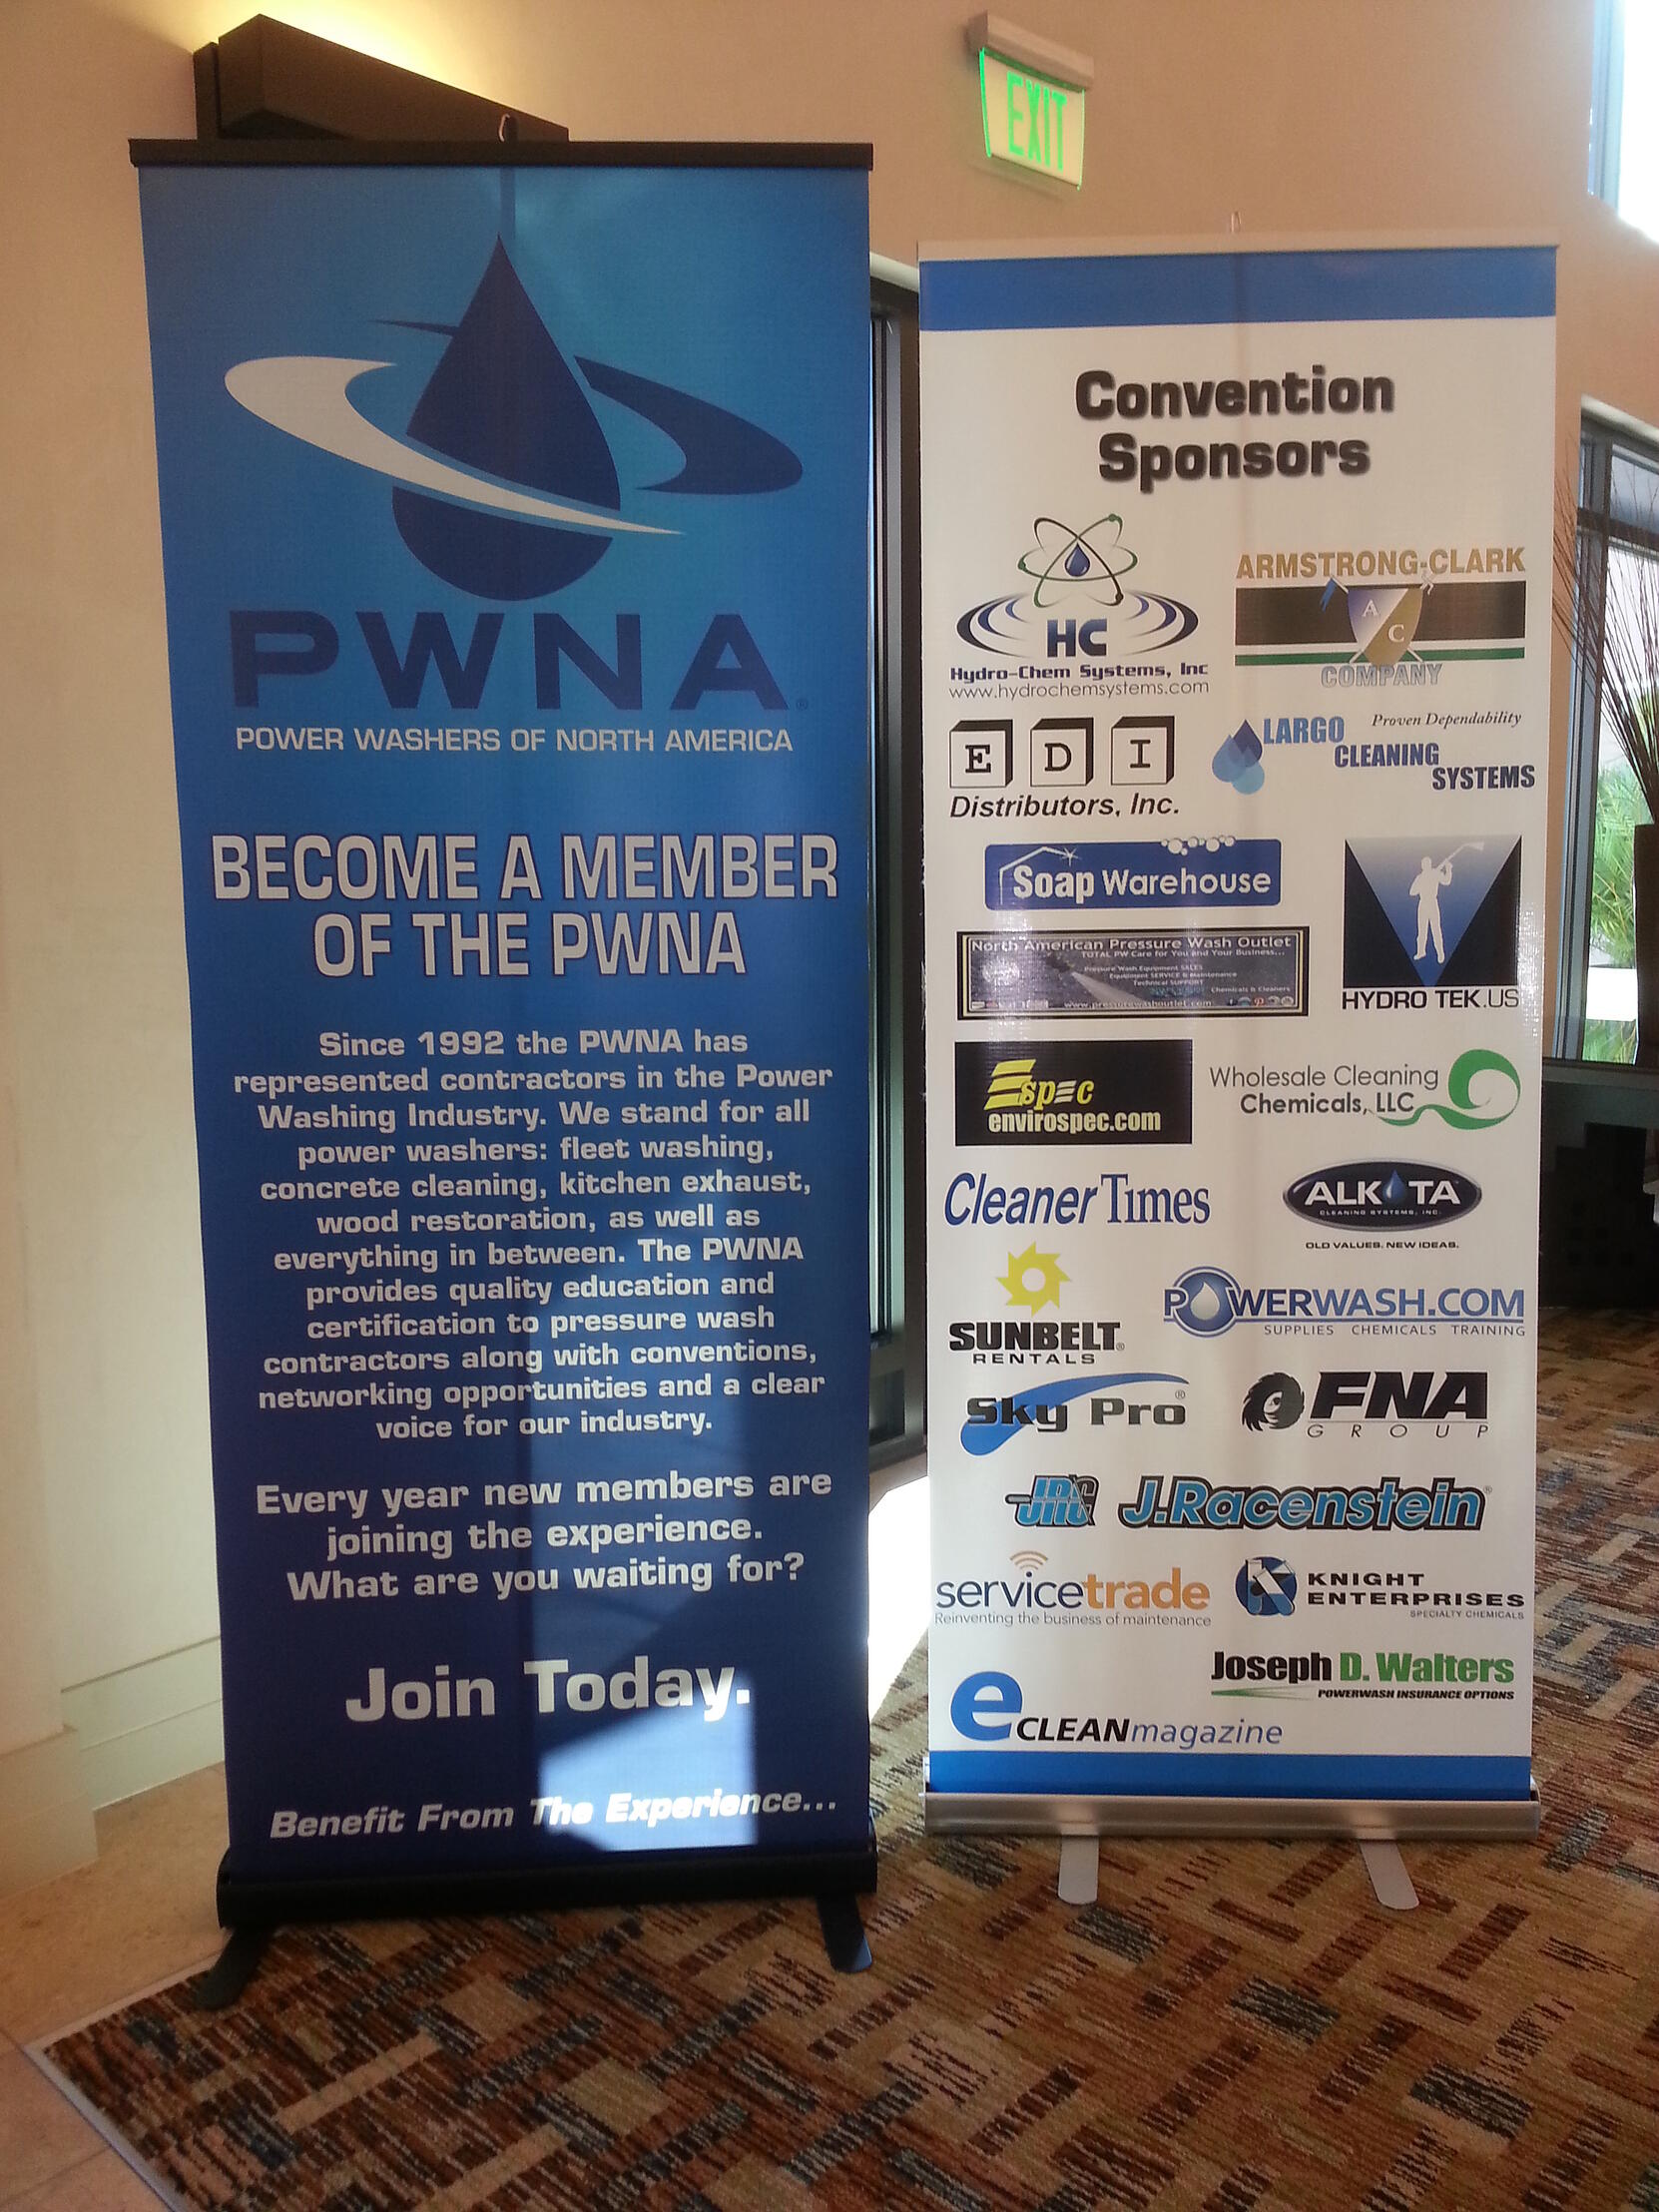
PWNA2014Signs


We again were a sponsor, an exhibitor and this year a speaker for not one but two breakout classes.

This year on Saturday November 1st was the day for the paid PWNA certification classes to be held. There were seven different classes in all covering many aspects of pressure washing; Wood Restoration, Fleet Washing, Roof Cleaning, House Washing, Kitchen Exhaust Cleaning, Flatwork and even an OSHA Lift Certification.

Held again for the third year at the Embassy Suites Orlando – Lake Buena Vista South hotel, attendees enjoyed, nighty happy hours, good food, great accomidations and of course pleanty of local activities for the families of the attendees.

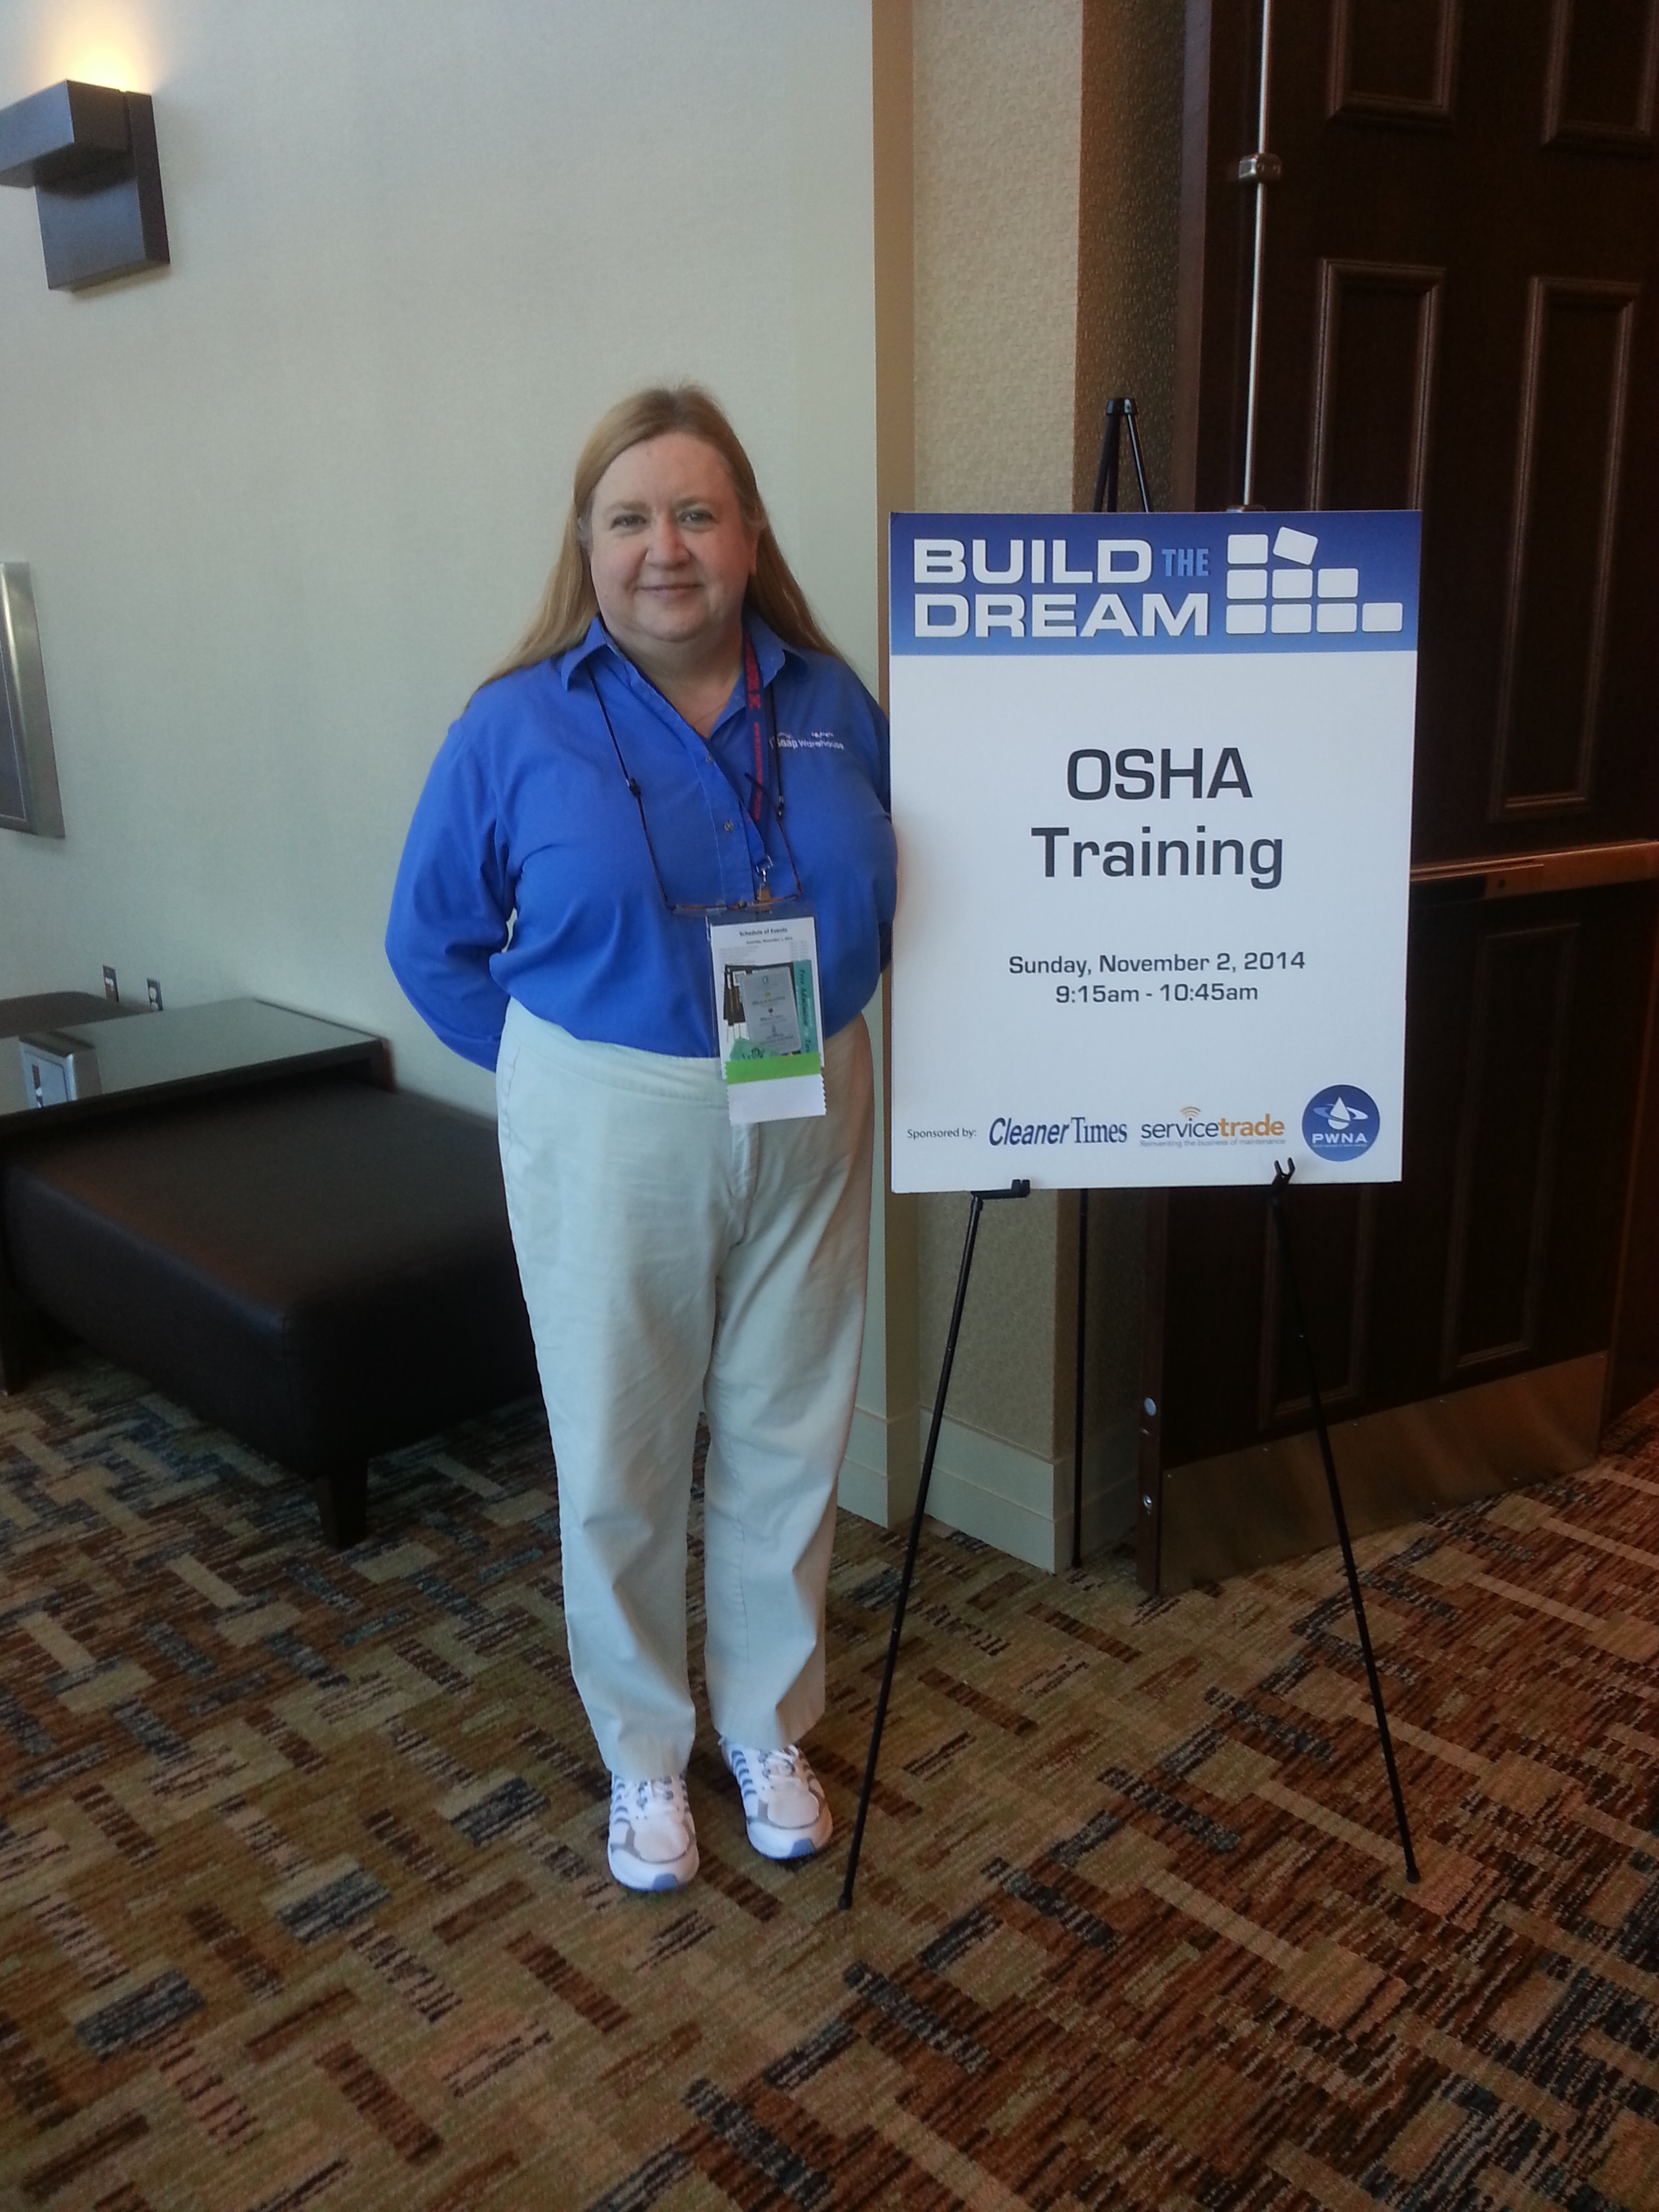
The two classes I gave were on "Chemical Safety" and "How to set up for OSHA training".

OSHAsign Both of which are often overlooked and interconected topics. I hope to give these classes again next year and at other events. We also had little supprise gifts for the attendees of corded safety ear plugs, and a mini container of bandaids. 
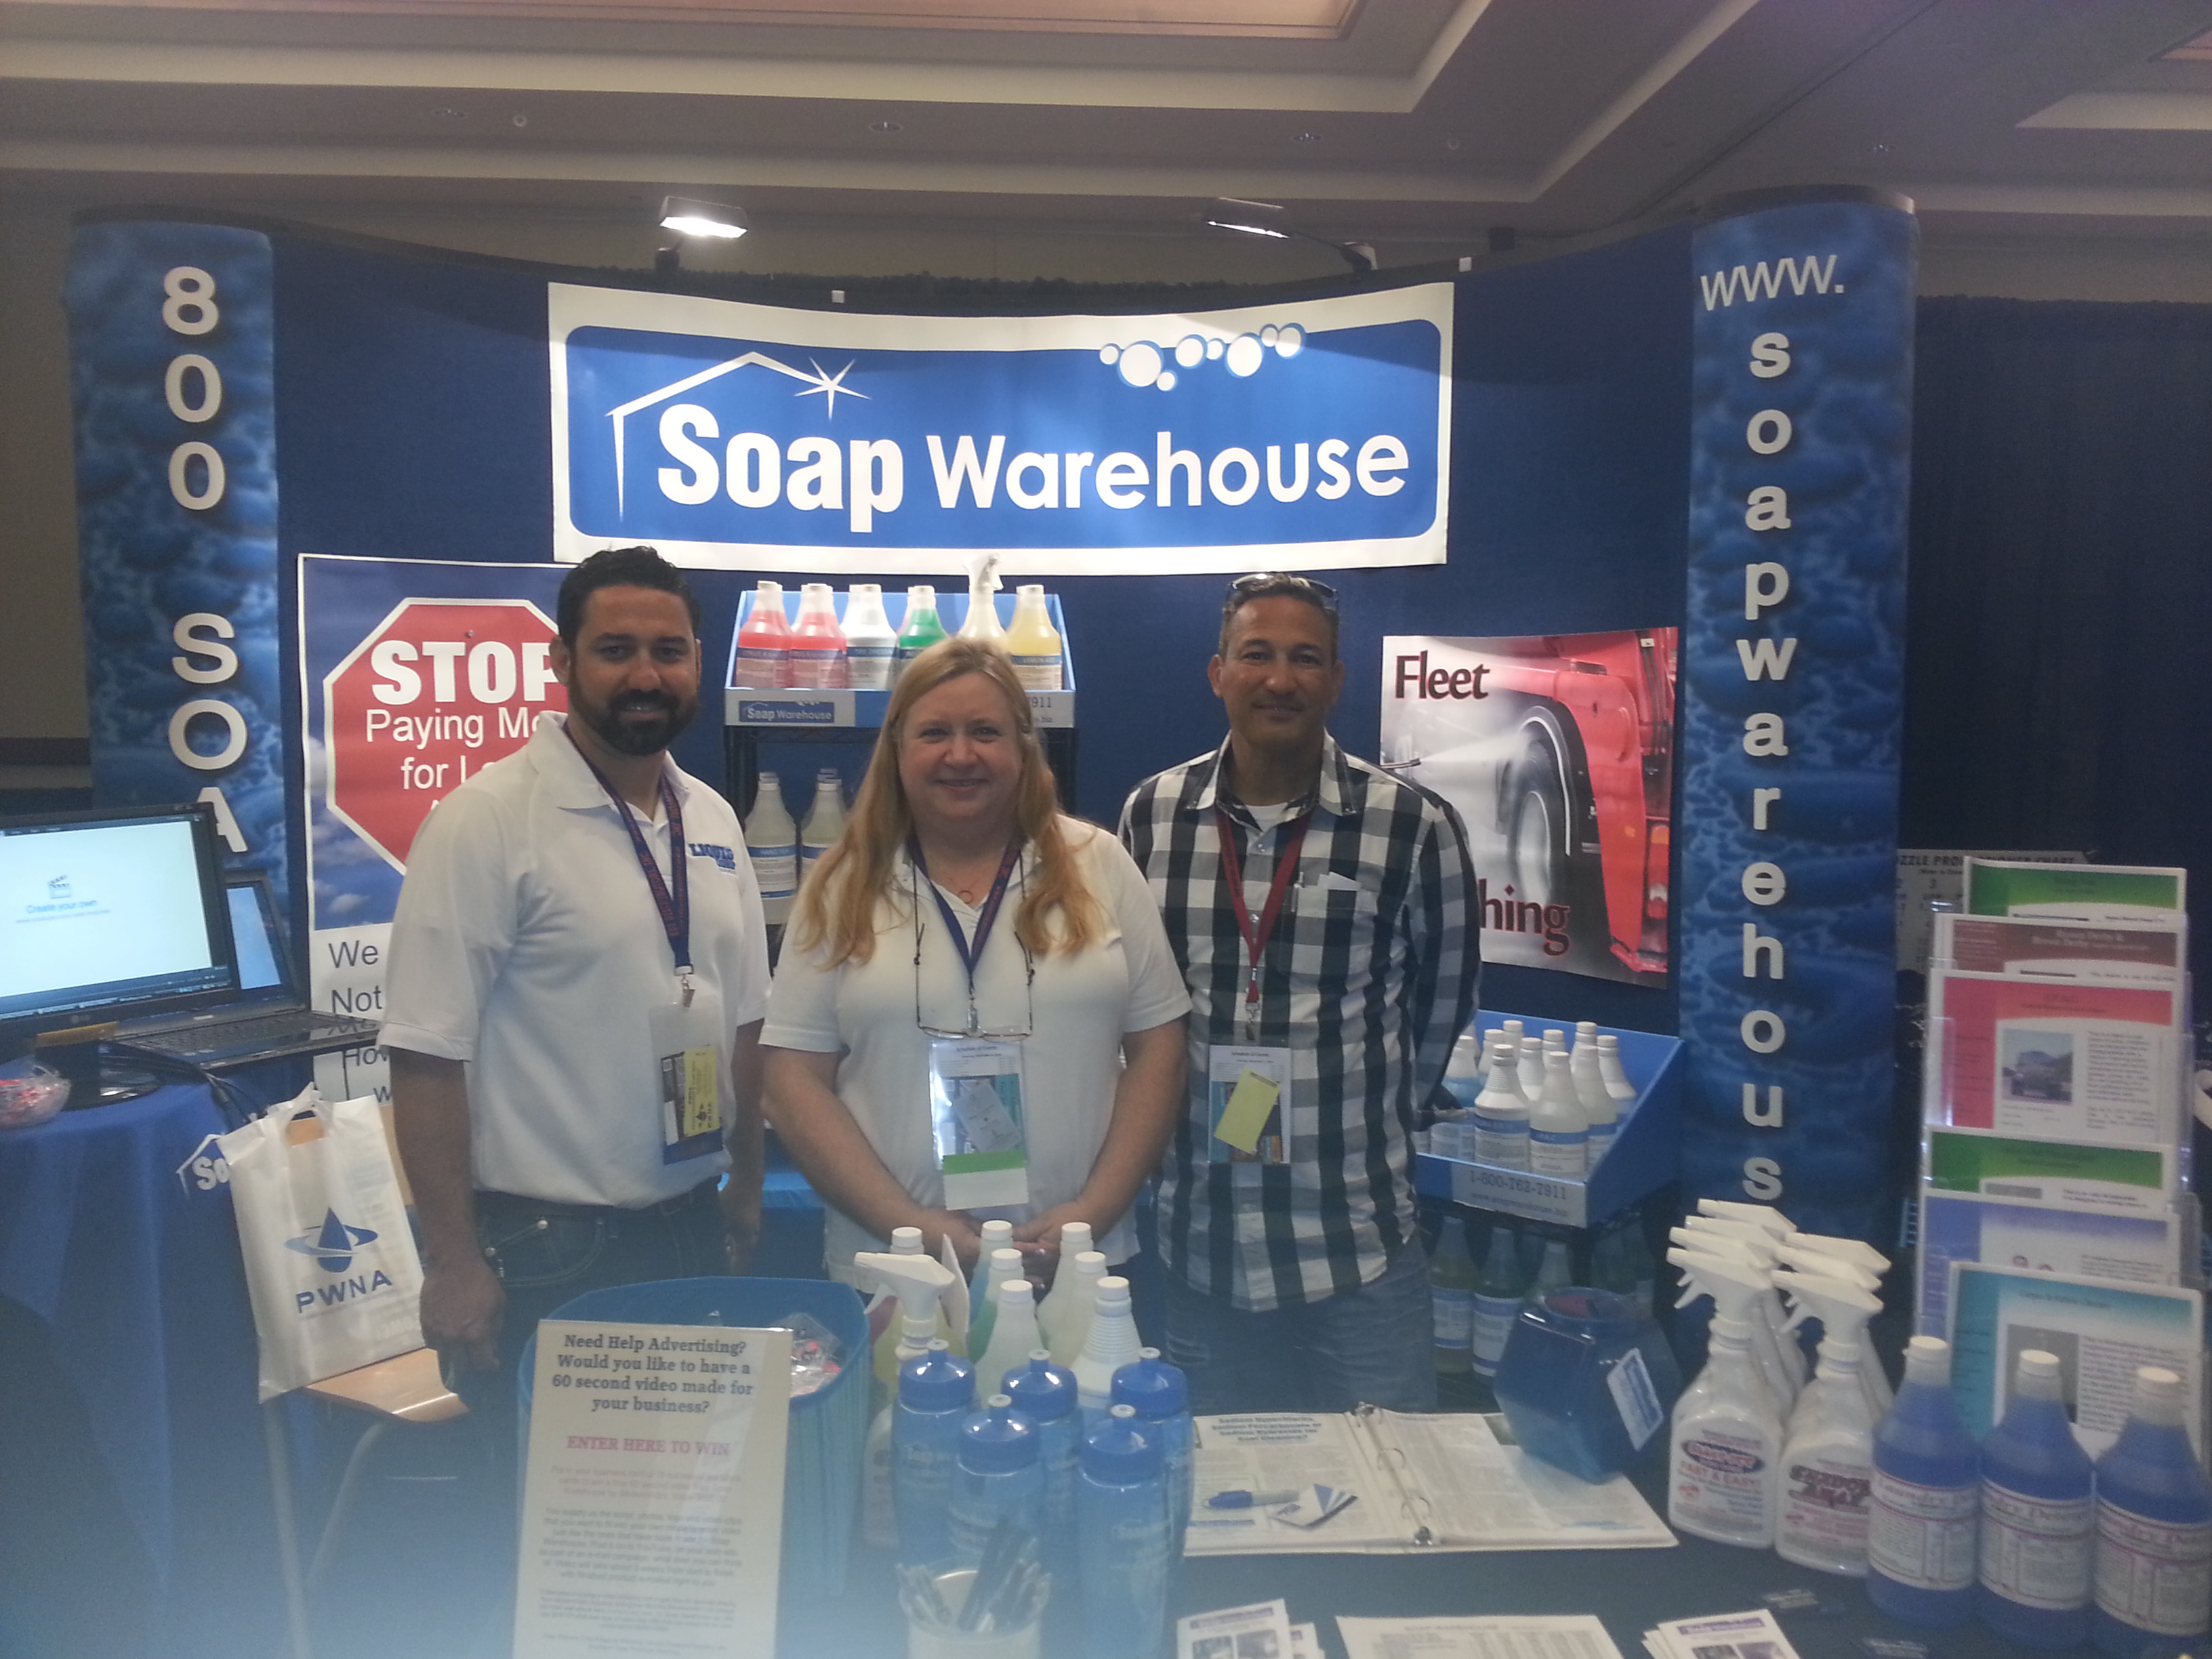
Soap Warehouse gave to the PWNA auction two 10 lb pails of the product of the winners choice to help raise funds for the PWNA general fund. The bidding winners were; Jonathan Fister who chose our Truck Wash Powder and Jay Jenkins who chose our Hard Surface Cleaner Powder.

Our Booth Drawing Prize was a professional 1 minute video valued at $795 that was won by Bill Mahan of Liquid Corp Services.

VideoWinnersPWNA14

 I hope to get to see and meet more Soap Warehouse customers at our next event.


Tags: convention, chemical safety, Trade Show, PWNA, OSHA training

Mini Bulk Tanks

Posted by Linda Chambers on Wed, Feb 19, 2014 @ 09:37 AM

At the UAMCC convention in Houston Univar came as an exhibitor and brought attention to a product many large pressure washing contractors might never have thought of or known was even available. 

Univar has a program called the Mini Bulk Service containment system. This is where they will deliver right to your location a specialized tank, sizes start at 200 gallons, that they will then fill with bulk liquid chemical that you purchase from them. 

Think of it the same as when a propane gas company puts in a large tank and then comes and fills it up once or twice a season. These tanks are set up for Sodium Hypochlorite and Sodium Hydroxide, the smaller one holds 200 gallons the larger one 600.

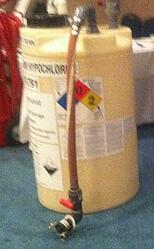
UnivarMiniTankUnivarDelivery

Univar offers a wide selection of chemicals delivered via Mini-Bulk, Sodium Hypochlorite being one that most exterior cleaning contractors would be using. For the complete product list, contact a Univar representative.

Now pricing will vary depending on your location and you must take into consideration a few things when making a cost analysis between buying chemical and getting it your self vs. bulk delivery.

1. Do you have the room and proper security for a bulk tank?

2. Do you use the chemical up fast enough to need at least 200 gallons or more at a time?

3. How much does it cost you in time and gas to get the same volume of chemical to your location any other way?

4. What is the cost with each delivery and price per gallon with the Mini Bulk Service? Buying in volume can save money.

5. Will you have to take time away from other work to get a delivery?

There are positives above monetary for using a bulk system:

Eliminates multiple smaller containers, i.e. 55 gallon drums stored at your location freeing up space.

Reduces the size needed for a tank on your rig since you can refill daily at your location.

Drums that need to be moved around can be a danger due to their weight and higher possibility of accidental spills. Bulk tanks reduce the potential for uncontained spills with some larger tanks even having their own spill container base.

Protects your employees by minimizing their exposure to hazardous materials.

Stops the need to clean/rinse and return emptied drums to get back a deposit or lower the cost for refill if that is what you are having to do now. That takes employee time and again can be a safety issue.

Reduces the number of times you have to stop and go get or take delivery of chemicals.

So if your business uses a lot of Sodium Hypochlorite you might want to call your local Univar location to check in to their Mini Bulk Services to see if it could save you time and money.


Tags: Mini Bulk Services, Sodium Hydrochlorite, UAMCC, chemical safety

How to properly mix our drum kits

Posted by Linda Chambers on Fri, Mar 29, 2013 @ 10:00 AM

Here it is the beginning of another cleaning season and the prefect time to again go over how to mix kits. I know this may seem rather odd to be writing a post on how to mix product, but we get calls all too often asking why a product is not working well, or the way that it should be, or how it had worked in the past, and more often than not, the reason can be traced directly back to how the product was mixed. Therefore I will be going over this information again. If you have more suggestions please add them at the bottom of this post.

First it is important to mix the component packages in the order they are labeled and it states in the directions.

For the most part they are very simple instructions but by not adding a part in the correct order you can either make a small difference, all the way up to making things dangerous.

If a kit comes in A, B and C and it clearly states put A in then add water, then please do that. I know some might like to start filling the drum before they pour in the first powder but there is a reason. First is to be sure the ingredients in the A component dissolve well. For instance it is much harder to mix a powdered chocolate drink mix into a full glass of cold milk then it is to put the powder in first, pour the milk in and then stir. Same principle. And make sure the water is not too cold! Even tap water in some parts of the country and during many times of the year may be colder then needed for proper mixing. Directions say to use "Tepid water". Tepid only means the same temp as your skin or around 98 degrees. If a powder is not disolving, try adding luke warm tap water, but if your water is cold you will need to add some hot water, say a gallon to every 4-5 gallons of tap water, that you are adding to the mixing drum (prior to pouring it in). In other words, have a 5 gallon pail that you are using to add water that you mix the hot and cold water together before pouring it into the drum. The reason being hot water increases chemical reaction and may become hazardous if hot water is used.

Next if it says to use 45 gallons of water, then add 45 gallons, not 20 or even 40 but 45. If the amount of water is too small and you add in other ingredients early, you might cause a reaction due to having too high of a concentration of the raw chemicals together.

Next, always add the second "B", third "C" and so on number of ingredients slowly to your mixture. One so that you do not splash chemicals back on to yourself or into your eyes (Always wear protective gear when mixing) and second so that you have time to properly stir and mix the solution for complete integration.

I know some people like to put all the powders together and then add all the liquids or put powders in after all the liquids are in the drum but this can cause dangerous results. Some of the chemical powdered ingredients should not be put together, or they would have come packaged that way. Or one powder may need to be added only at the very end when you have the most amount of water in the drum because it may produce a stronger reaction if added too soon or when less water is present.

When pouring the liquid components into a partial solution, add slowly and stop once or twice to mix well so the new liquid does not fall straight down to the bottom of the drum, since it will be denser than the solution already in the drum. Once you have emptied all the liquid that will easily pour out be sure to scrape the walls of the pail off to get all of the liquid out. A kit is designed to use all of the parts for the correct results. If it is too difficult you can just add a small amount of warm water, say 1/2 gallon, and with the lid back on and tightly closed, slosh the water around in the pail to dissolve the remaining residue into a thin enough liquid to be pored into the drum with the rest of the mixed solution.

Once you have finished adding ingredients and mixing make sure you top off to the proper level. If you have a product where one drum will make two, be sure you have thoroughly mixed the entire 55 gallons, transfer half of the drum (27.5 gallons) to a second drum and then fill both back up to the 55 gallon level. If you wait for even a few hours or a day before transferring make sure you thoroughly remix the first drum before you start to pump out the 27.5 gallons in case you have settling of ingredients. This can sometimes be the reason why one drum seems to work much better than the other because you got an uneven amount of active product ingredients in each drum.

This is also the reason you mix any super concentrated product all at once and DO NOT just pump out 1 gallon of a 5 gallon mixture and make only 11 gallons of product at a time. These super concentrated pails are designed to be completely mixed because of how the ingredients will settle out or layer in the pail. if you try to mix partial batches, no two mixtures will be or will work the same.

Same can be said when you mix a drum and then only pump out small amounts at a time. You should always remix at least for a few minutes to reintegrate the solution. Some products settle out more than others and temperature can be a large factor in this. If you store your chemicals out in an unheated building or area, products will have the tendency to settle more quickly than if left at 70-75 degree average room temp. Try to pump from the center of a just re-mixed barrel to insure you will get the same product gallon after gallon. If you only pump from the bottom your product may be too strong in the beginning and too weak at the end. Same with only pumping off the top. You may not be getting a proper mix of active ingredients to give you the best performance.

Our products are all produced with a very short pre-ship storage time. We try to have product made from just a few weeks to only a few days before they are ordered and ship out. This way they are very fresh and have a long storage life, for most at least two years if stored properly. This way you can buy a large volume of product to save money and shipping costs and even if you do not use all of it by the end of your wash season, you can be sure it will still work when you mix it and use it at the beginning of the next season. With this said it is important that if product has not been kept in the most ideal conditions that when it is mixed you can take additional steps to try and make it still work for you. We have had customers call that have let product freeze or nearly freeze, get wet or exposed to moisture that the powders become solid, etc. Many of these problems can be addressed with sometimes no ill effects to the end mixed product.

If you have a liquid component that has frozen or has gotten extremely cold, you must raise its temperature high enough to allow it to pour but not too high to destroy the products chemical integrity. We suggest that you get a larger container than the 5 or 6 gallon pail the liquid is in, fill it with warm water and place the pail into it. Do NOT use HOT water, this way the temp is brought up slowly. It may take more than one dunking application to have this work. But do not do what one customer did. He broke open the pail, dumped the frozen rock of liquid into an open 55 gallon drum and then poured boiling water on it trying to melt the ice block of concentrated product. He ended up not getting all the product dissolved before he added all the water to make the 55 gallons and then it did not work properly even days later once he got all the settled melted bits mixed.

Now sometimes if stored for a long time the bagged powder mixes can compress and get firm, but they should not turn to solid blocks. Only if they are exposed to moisture, heat and sit for long periods would this ever happen. If it does it may still be usable but you must allow the block to soak, break up and dissolve in a much smaller amount of water than normally used for mixing. Again using warm water, not hot, add the solid powder to about twice the amount of water by weight than you have of the powder. So if you have 5 lbs of solid powder place it in 10 gallons of water and wait for it to completely break down before mixing it with the other ingredients in the proper order with the other ingredients and the proper amount of additional water.

I hope this has been helpful and as always, if you have any questions please give us a call. 1-800-SOAP-911

Tags: proper mixing, drum kit, Soap Warehouse, chemical safety

The Importance of MSDS's.

Posted by Linda Chambers on Mon, Nov 01, 2010 @ 11:21 AM

I have touched on this topic before but I plan to take this month, November, to emphasize the importance of the Material Safety Data Sheet.

In fact I will be making available a whitepaper "How to read a MSDS." that we have put together for free just by registering and requesting a copy.

Any company or business that uses or carries chemicals, hazardous or not, should be familiarwith MSDS's and the information they hold. If exposure to any chemical occurs it is important to know if prompt medical action is necessary, and if it is to be able to provide the medical professionals with the information that they need to treat the exposure.

You must truly understand the importance of carrying MSDS in a safe, protected and easily accessible place. This includes company vehicles carrying the chemicals to and from job sites that these chemicals are being used to perform daily jobs.

Many do not realize if the DOT (Department of Transportation) or police officer stops you for a traffic infraction, routine inspection or because of a traffic accident and MSDS's cannot be produced for the chemicals you carry, your vehicle can be impounded and substantial fines can be made against you and your business.

But even more serious could be the life or death importance that any delay in supplying a health provider with information may cause. 

"Time can be the difference between a routine treatment and serious complications, even death."

Part of your employee training should include where to find and how to use MSDS's. MSDS's should be kept in a single binder in plastic sheet protectors stored in a manner that they can be found and reaily accessed at any time. Duplicate copies of this binder should be in every vehicle or location these chemicals are transported or stored.

We will also be sending out Daily Tips this month to our FaceBook and Twitter accounts dealing with MSDS's and safety. I hope you will read and use them.


Tags: Special offer, MSDS, chemical safety

Sign up for Newsletter by Email

Latest Posts

Posts by category