Follow Us

Soap Warehouse Blog

How to use a Spill Kit

Posted by Linda Chambers on Wed, Jan 25, 2017 @ 10:27 AM

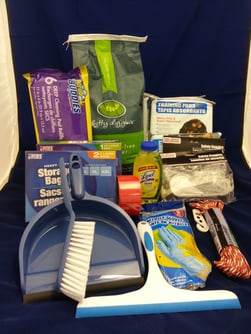
This is the last of my series on Spill Kits. I have told you why you need one, how to put together one your self and now we get to the part of actually using them.

Here are the steps you need to take when you see or are made aware of a chemical spill:

1. Is the spill still happening? Ex: a value is open and chemical is spilling out, a barel tipped over and contents still inside is still flowing. Safely stop the flow first. Put on gloves if needed and stop the flow.

2. Has someone been injured by the spill? If Yes open the nearest Spill Kit, put on PPE and remove the victim. If no victim or if someone else can handle their care go to the next step.

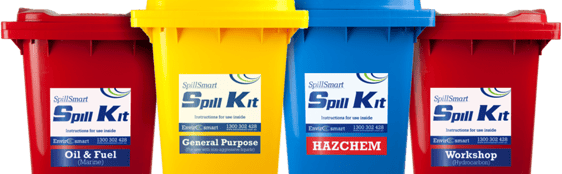
3. Determine what has spilled; look at the container it came from, look for labels. If you know what it is and what spill kit to use move on. If not then start with a Universal or General kit until you learn otherwise. If you can identify it but do not actually know how to handle this chemical, go get the SDS and check it for what PPE and clean up measures it tells you.

Types of Spill kits.png

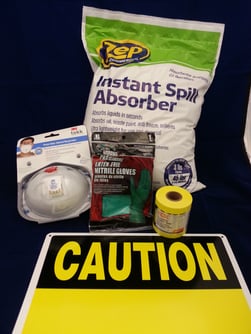
4. Once you know what it is and which type of Spill Kit to use if you have not already needed to open the kit now and put out the safety measures to keep others out of and away from the spill. Enlist others to do this if possible so you can get right to the spill.

5. Put on all needed PPE if you haven't earlier. If the spill is large, and more than one set of PPE is included and someone else is available have them get ready to help you.

acid spill kit.jpg

6. Contain the spill with supplied barriers; socks, booms, sand, drain covers, etc. Start with the highest hazard. ex: spill running toward a drain, electricity, road, stream, down a hill, etc. Choose the best route for cleanup according to the surroundings of the spill.

Using a spill kit.jpg

7. Once contained, meaning the spill can not get bigger, neutralize if needed. Ex: if it is an acid or corrosive. 

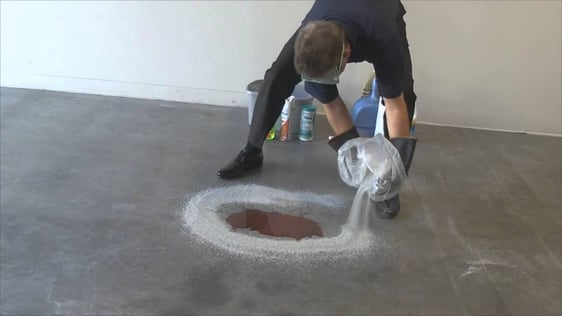
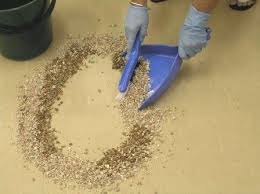
8. Once neutralized start to apply absorbent materials; pads, pillow, sand or other loose absorbents. Work from the outside edge inward. Continue until you have used enough to absorb all of the liquid or you have run out. If you have exhausted your supply and you still have a center of liquid move or put down barriers at the edge and start removing the absorbed materials while more supplies are found or until official first responders can get there.

Spillcleanupchart.jpg

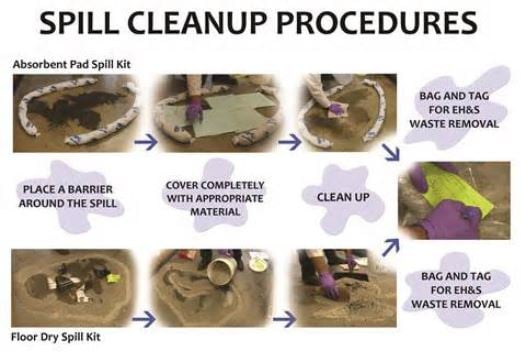
9. Clean up using broom and pan, shovel or other supplies and empty into a clearly marked as hazardous, approved container for removal; bags, bucket, pail, etc.

SweepUpSmall.jpgPuttingHWintobags.jpg

10. Clean spill area once cleared of spill with regular cleaning supplies; mop, neutral cleaner, sponges, etc. and discard them as well as they could still have traces of hazardous chemicals on them. You want to clean with a neutral cleaner so you don't have any chemical reactions with the residue from the spill.

11. Once cleaned and dry, remove all warning safety measures you had set out.

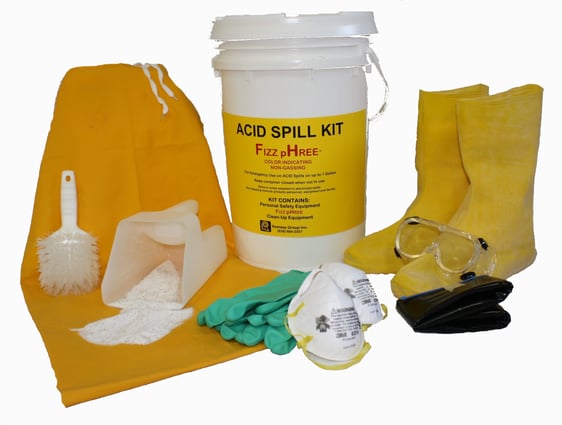
12. Immediately restock Spill Kit or replace with a new one until you can resupply.

Tags: safety, chemical safety, spill kit

DIY Spill Kits, all you need to know.

Posted by Linda Chambers on Wed, Jan 18, 2017 @ 12:42 PM

Any contractor that works with and transports hazardous chemicals needs to also have with each vehicle that contains these hazardous chemicals a chemical spill kit to comply with OSHA standards.

Most contractors are unaware that they need to have or how to use a spill kit. Just like many do not have or carry fire extinguishers. But OSHA has standards for the safety of the employees and the public at large when it pertains to hazardous chemicals.

I spoke in my last post on what OSHA says what a spill kit is and what has to be in a spill kit, and in fact they are pretty vague on a number of points but I will not go back over them, just please visit that post.

Now as I said in my last post you can buy ready made kits but I will show you how you can make your own DIY for many times much less and still be within the guidelines.

Here again is the list of required items for a spill kit:

A warning measure; A frame floor sign, caution tape, cones, etc.

PPE for at least one person effective to protect them from the spill during removal. Gloves, glasses or goggles, mask, shoe covers, etc

A physical barrier to place around the spill to contain it, which may or may not also absorb, OSHA does not say it has too. Can be berms, bumpers, drain covers, even sand.

Absorption materials; Sand, clay, pads, mats, etc.

Removal equipment; broom, shovel, waste pan or scoop

Removal containers; can be the spill kit container itself, bags or other approved container.

Products to clean the area once the spill has been removed. Such as a mop, cleaner, sponges.

And that is it.

If you can not reasonably carry a kit large enough to handle all the chemicals on your own you at least need to have available enough to lessen a spills impact before the proper first responders and hazdardous material removal teams can get there. 

This could include using materials to contain as much as possible, block or close off storm drains, prevent running across a road, traveling into a waterway, etc.

Here is what I bought and put into my own DIY 5 gallon spill kit:

I used a white cleaned out 5 gallon UN approvel pail. Make sure it only contained as near neutral a soap as possible but a pail from something else like a Firehouse Pickle pail can be fine too, plus it is already red, or an orange Home Depot pail.

I wanted my kit to supply two people to use as a Universal Kit that could take care of a 5 gallon size spill.

Here are items I picked up at the Dollar Tree: a bag of cat litter, pack of 5 puppy training pads, 2 pair of safety googles, a plastic dust pan with sweep brush, a small sqeege, pack of 8 Nitrile gloves, a red and white clothes line (to use to rope off spill area) Bright red tape, Heavy weight zip storage bags, a small bottle of Lysol disinfectant cleaner, a pack of 6 absorbant pads. $11.00

2015-03-18 11.12.14.jpg2015-03-18 11.24.38.jpg

A stop at a Dollar Store for large sponges and zip ties, $4.00+ some change.

Then I went to Home Depot and got:

A two pack of N95 masks, a roll of caution tape, a caution sign (to hang on the rope), one pair of heavier Nitrile gloves if needed, and a 3 lb bag of Zep instant spill absorber and one bag of play sand. This was my most expensive stop and not all of the supplies are all going in. $32.00

Plus a few items I had lying around the house so they were at no cost. Total still under $50 unless you have to buy the pail, which I did not.

Here is how I put it together:

Got the pail clean and ready by labeling for the type, Universal and amount of chemical it should treat, 5 gallons.

Put the items you will use last in the bottom, fill up until what you will need first on top. 

So cleaning items in first: Lysol, sponges.

Then the disposal items: marked hazardous bags, extra zip ties.

The disposal removal items: broom and pan

The absorbant materials: the pupply pads, cat litter I had poured into an empty quart milk jug and marked with permanent marker, 2 Heavy zip bags filled with the Zep absorbor material about 1 lb each. 

Containment materials; Two homemade berm socks made from the cut off legs of a pair of knit tights fiiled with sand and tied closed. And another quart milk jug filled with more loose sand to use if the socks are not enough.

PPE next: Masks, Gloves and goggles all in their own baggies so you open only what you need.

Warning measures on top: Sign, caution tape and rope.

And that completes the kit.

If you would like a copy of my e-book How to make your own OSHA Spill Kit, email me at lchambers@georgiachemical.com

Next Post: How to use the kit to clean up a spill.


Tags: chemical safety, spill kit

UAMCC event Atlanta March 19th 2015

Posted by Linda Chambers on Mon, Mar 23, 2015 @ 11:38 AM

The weather may have been dreary outside but those that came to the UAMCC Atlanta event didn't mind.

Banner

Soap Warehouse and Iron Man Pressure Washers hosted this event on Thursday March 19th at the Fairfield Inn & Suites at Gwinnett Place. Most came from the local metro area, but there were also contractors that came from out of town, from Augusta, GA, Palmetto, GA, Greenville, SC and as far as Fort Pierce, FL.

Lindapresenting031915

It was a fast past packed full day of sessions mainly focusing on marketing and OSHA compliance. With sessions shortened to only 30 minutes each, a lot more focused material was covered, which kept the day moving and so no one could be uninterested for long. Sessions covered: Linda Chambers from Soap Warehouse gave talks on Inbound Marketing, Why you should use Videos, and Referral Programs.

Soap Warehouse gave away a 60 second professional video as a door prize after the Why use Video session and Todd Reese of Georgia Power Washing won.

ToddReese

Three speakers came in to cover Outbound Marketing with Online Yellow Pages and Adwords. Then Arrie Parker from Iron Man had a session on Occupational Health followed by a healthy lunch of Subway sandwiches, fruit, chips and drinks.

Lindapresenting0319152ArrieParker031915

Things went so fast a few extra sessions were squeezed in. After lunch Nichole from UAMCC discussed the new revisions of their certification program and other benefits of membership. Arrie gave again a session on Cold Calling he gave at this event last year, which was followed up by Linda giving how to set up OSHA training, after which Soap Warehouse gave a way a $50 product gift card and Ryan Fox of Outback GutterVac won that door prize. Ryan is on the right.

BretMattisonRyanFoxBretMattisonRyanFox

Next was Spill kits why you should have one and how to make one, ending with the hands on OSHA Spill kit training at the end of the day on how to put together your own DIY spill kit and actual spill kit practice inside in the hotels pool area simulating a small spill of a potassium hydroxide concrete cleaner.

MakingaspillkitSpillTraining

Spilltraining1

The event finish just before 4:00 allowing everyone to get on the road to try and be ahead of some of Atlanta's well known traffic. 

Tags: UAMCC, Soap Warehouse, event, OSHA, marketing, training, spill kit

Sign up for Newsletter by Email

Latest Posts

Posts by category