Follow Us

Soap Warehouse Blog

Linda Chambers

Recent Posts

New Year, New Location Coming.

Posted by Linda Chambers on Fri, Dec 29, 2017 @ 09:00 AM

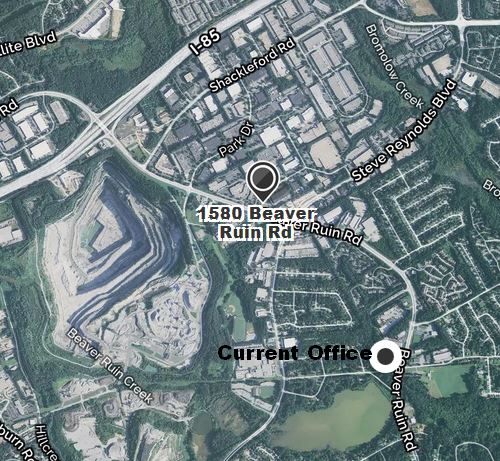
2018 will be a great new beginning for GCE. After years of searching we have found a new, bigger location to move our office to in Norcross, GA. Do not fear we are not moving far. In fact not even a mile up the road. We will be moving from our present location at 1185 Beaver Ruin Road up to 1580 Beaver Ruin Road, toward I-85, closer to Steve Reynolds Blvd. This new location has better access. We are at the front of a business park that has a dedicated traffic light, so coming in and out will be easier.

OldtoNewLocation

This new location, is almost three times the size we have now and we will be able to have a much larger showroom that will allow us to carry and stock more equipment, new product lines, and create a better shopping experience for our customers.

We will have a large shop area to continue our service, repair and fabrication jobs. We are planning to have a large outside holding area to store our and possibly contractor customer's equipment, for those that need storage space. This added space will allow us to carry additional rental trailer rigs as well as having the opportunity to have new rigs available for immediate sale, instead of just building to order as we do now.

We will have a new area for those buying bleach to pull up to at the back of the building once you have come inside the front to purchase it. As with any change it will take a little adjustment and small learning curve to get use to the new set up for us and our customers.

With this new space we will have a conference room and space to set up and hold more onsite learning opportunities for customers. We are already working and planning to have up to one meeting a month next year, once we are open, held at our store for local and other contractors.

Our first big event will be an Open House for the new facility, so stay tuned for that announcement after we open, hopefully by the end of Feb or in early March. I will post pictures of the new location as soon as possible. We will have some cosmetic work to do before we can move and open. We wish all of you a Happy New Year.

Tags: New Location, New Year

National Business Plan Month is here again

Posted by Linda Chambers on Mon, Dec 18, 2017 @ 12:21 PM

It is that time of year again, the last month of the last quarter and time to start thinking ahead to the new year. And as it so happens December is also National Business Plan Month. Here is a refresher on this for 2018

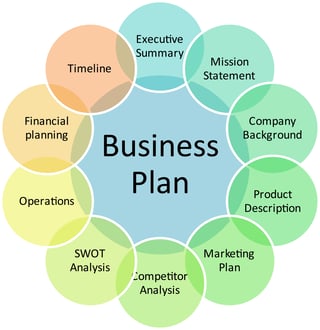
Every small business should have a Business Plan. Especially if you have already been in business for a while, and here is why. There may come a time as your business grows that a banker, CPA or investor will ask to see your business plan and boy will you look foolish when you have to say you do not have one or that you have no idea what that is.businessplan.jpg

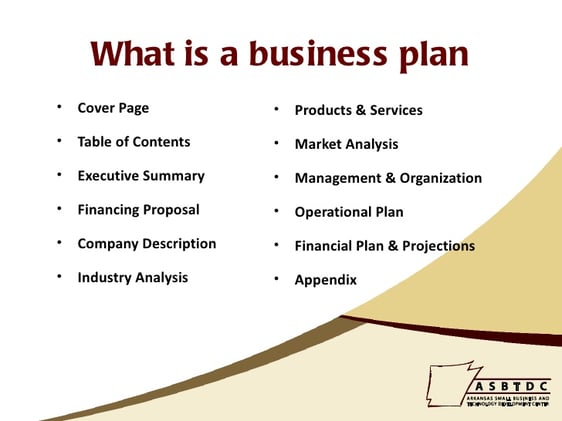
All a Business Plan is, is a plan to help manage your business during its life, plain and simple. It  is just a road map of where you are to where you want to end up. It will include things like your mission statement, the who, what, where and how of your business. What type of work you will perform, in what locations, who is your prospective customer, what prices are you expecting to charge or how you will calculate your pricing, what equipment you will buy, at what cost, will you spread this cost over a set number of years, will you do all the work yourself or hire employees, how will you deal with these employees, and what your expected profit will be in a set period of time from the start of your business.

busPlan2.gifbusiness-plan.jpg


If you do not have one already the governments Small Business Administration is a good place to start to get a template of what should be included in a plan.http://www.sba.gov/category/navigation-structure/starting-managing-business/starting-business/writing-business-plan. And if you are really new to business and just jumped right into it you might even want to back track and take a look at the steps of starting a business they offer as well, http://www.sba.gov/thinking-about-starting. You may find you have missed a few things you should still think about doing.

how-to-write-a-business-plan-.jpg

This plan is not written in stone and every so often, like once a year, is a good time. You need to take it out, look it over and make adjustments to it. For instance when just starting out you may have worked alone and mainly did house washing, but over time you added employees, these grew into multiple crews and you found you enjoyed cleaning and staining decks, while doing house washing, more than washing homes and your business shifted to mainly deck work. With this change your business plan should also be changed and rewritten. In fact many business plans are made to cover a finite amount of time after which a new plan is expected to be made to cover a next set amount of time. There are other places and groups available to help you with this, like SCORE http://www.score.org/resources/business-plans-financial-statements-template-gallery, Bplans.com or even Microsoft Office. Even here in your own industry there are groups that have done the work for you or will help you, such ashttp://www.powerwash.com/articles/pressure-washing-business-plan-power-wash-contractor.html. Also free examples to watch and learn from on youtube.com, just search "how to write a business plan".

Just as many of you experience, Soap Warehouse Brand went though a major change of ownership and direction when it was bought by GCE Jan 2016 and I myself worked to add Soap Warehouse into the GCE business plan for a projected 5 year period. And now GCE after years of looking has found a new larger location, right up the road to move to. So we updated our business plan to give to our bankers with the purchase of the new location. This plan had to include the changes that this move will provide us and how it should improve our business overall. Here is to the New Year and we hope you will also have a profitable one.

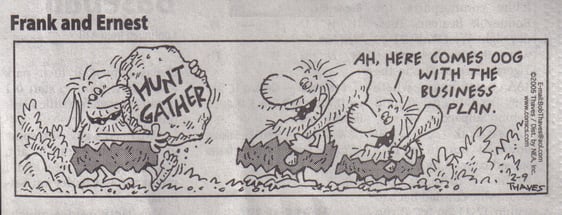
Caveman-Business-Plan.jpg

Tags: business plan

Creating a Customer Packet

Posted by Linda Chambers on Wed, Aug 02, 2017 @ 09:12 AM

You can create a number of different customer document packets for customers; Intro packets, Commerical job packets, but the one I feel is a must for the residential contractor is the "Thank you for scheduling" packet.

So why make and send a "Thank you for scheduling" packet?Sounds strange but sending your first time or even a repeat customer a small email packet of information just after scheduling but prior to the cleaning is a great customer service that will put you heads above the competition and here is why:


1. They get all the information they need from you up front without having to ask for it, or heaven forbid, forget to ask.

2. You create set boundaries and expectations from the start. The information to give them can educate the customer, allow you to work well together and they can know exactly what to expect.

3. It gives a fantastic first impression that you are a true professional. It can make them feel like VIP's and valued by you.

4. It gives them something to talk about even before you have done any service for them. You don't think they will mention this to family and friends and talk about what you are going to do for them. This positive word of mouth exposure is really valuable.

So what should be in your packet?

• A copy of your estimate and or agreement for service spelling out what you will cover and what it will cost. You can also, if you want, list add on services and prices that they might want to add. (Even if you have already offered them before during the estimate) • A list of what to do before you arrive (ex: Close windows, move furniture, remove potted plants) and if you have a fee, the extra cost for your crew having to do it instead, or if you might cancel part or scale back service because they did not comply.
• A guide listing the service they've chosen and what steps they may see you doing while working. (ex: Where you will park, how many workers should be there, where you will run hoses, pre-wetting plants and bedding areas, covering plants, or what ever your normal routine is) Helps prevent them from stopping you mid action asking, Why are you doing that?
• Common Q&A's customers have asked. Helps speed things up, and again so they are not stopping you from working to ask these when you get on site.
• Business information including office hours, phone numbers, and listing your cancellation policy one more time.
• Links to your website, and social media accounts.
• Link to your survey, to be completed once the work is done. (Make sure you have a nice automatic thank you email set up to send when they do.)
• Details of what your referral program is and how to participate. 

Setting up these packets to send out and using them can save you time, increase sales and make you even more desirable to talk about once you have given them a great cleaning.

Tags: Business, customer service, information packet

Plan now for your businesses future after you are gone.

Posted by Linda Chambers on Tue, Jul 18, 2017 @ 12:00 PM

Although when you first start a business this may be the furthest thing from your mind, but what would happen if you suddenly died? Or even if you were injured and you were no longer able to work your business?

Question-1

What would happen to your family and their source of income?

Who would step in to run your business?

Would your heirs be able to sell your business and for what it is worth?

Now of course there is the issue of having insurance but beyond that do you have any plan in place for what could and would happen to your business?


What you need is called a Business Continuity Plan, which is not the same as a Succession Plan that I will cover in another post. 

buy-selling-wealth_zJ6TIBDu
  • It creates a guaranteed market and price for the business and its interests.
  • It allows the business to carry on as normal without stoppage due to your death or debilitating illness.
  • It allows the business to carry on as normal without interference from heirs, whether they are included or not in the plan.
  • It can provide liquidity for the estate of a deceased owner allowing the business to be turned into cash for the heirs.
  • It can provide an established value of the business for estate tax purposes.


There can be many different buy-sell agreements that can be set up according to you, your family, the business and employees needs.


There is the Cross Purchase: When a business is already owned by more than one party or partner where they have agreed that the surviving owner or owners are obligated to buy the interest of the deceased, and the estate of the deceased is obligated to sell at a previously agreed to price or by a continued payout to the estate.


An Entity Sale: This binds the business itself to buy the interest of the deceased owner, and the estate is obligated to sell, when the business is a corporation. This is sometimes referred to as a stock redemption agreement.


If the business is a sole ownership, you could plan to have an employee purchase. Where you may have one or more employees that have been instrumental in running the business and you as the owner would like to see the business to continue under their ownership. This agreement between the former employees and the deceased estate can be an outright purchase for a set price, or a gradual buy out allowing the employees to buy over time and the estate to continue to receive an agreed upon income until finalization of the sale or end of the terms of the agreement.


You can also have a Wait and See agreement. This type of agreement allows the flexibility in that the final decision to buy and sell is not decided until after the owner's death but the details of running the business until that time is spelled out in the agreement. This way the person in charge of the estate would oversee the terms of the agreement and the business could continue to function as normal allowing the business to stay a viable investment.


With a sudden death the hardest part maybe for the parties to find the funds needed to complete the purchase detailed in the plan. Here are some common funding sources and the unique challenges, though having enough life insurance is always the best solution.


Personal Funds of the Owners: Most business owners and partners keep the majority of their money already invested in the business so they may not have large sums of liquid assets available for the total purchase price.


Borrowed Funds: Many times banks may not be willing to lend money for a business that has lost the owner or a partner or the cost of such a loan may have a rate of interest that may be excessive that will be a burden to the business. Or the business may have already reached it borrowing limit.


Installment Payments: The heirs may not be able to get the agreed to sums from the business in payments and there is no guarantee to receive future payments if the business fails.


Life or Disability Insurance: Can be set up ahead of time to pay for the estimated costs of which ever plan you have chosen to use.


  • Insurance can be purchased separately from any another policy.
  • The policy can be purchased by the business.
  • The premiums are over time a small fraction of the benefits to be paid out.
  • The benefits are available right away after death or as soon as the policy allows with a disability.
  • Death benefits are generally federal income tax-free.


Do not leave the burden of running your business or the uncertainty of not having continued income for your family to deal with. Start now while you are able.

Tags: Business, business plan, Continuity Plan, Insurance

Case Study Diamond Springs Water "Fingerprints on a Fleet"

Posted by Linda Chambers on Fri, May 12, 2017 @ 12:21 PM

Summary

Customer had contacted us looking for a cleaner/wax to clean their delivery trucks. Later they were still having what they were calling an issue to remove greasy fingerprints on their delivery trucks. But after finally asking for photos the true issue became clear.

Challenges

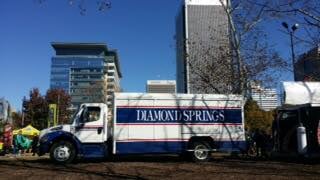
Diamond Springs Water, a spring water company, was having cleaning issues in their Raleigh, North Carolina location with their delivery trucks. The products they had been using was not giving them the finish they desired for their customer image.

They contacted us through our website contact page.  With this message:

 "We have a fleet of beverage body trucks. We are looking for a cleaner/wax solution for cleaning our trucks. We use a portable pressure washer, and can siphon the detergent or spray directly on the vehicles. Can you tell us which product would work the best for us? "

What Products Were Used

We first suggested if highly dirty between washings to use our White Lighting and our Spray Wax. If not too dirty then to use the Blue Lighting instead. This combination would clean without harming the current finish, give a short term protective wax finish and the wax would make the subsequent washings faster as the new dirt would come off easily with the wax before a new spray wax coat was applied with the new final rinse.

We also suggested for their trucks that currently had a nice finish to use our Big Rig Brite that contains added water softeners and sheeting action to prevent spotting. Spray Wax would normally not be needed but could be used with it.

Results 

They ordered samples of the Blue Lighting, Big Rig Brite and Spray Wax.

Initial test washings went well but had specific cleaning needs for :

  • Truck chrome
  • Truck exhaust stacks
  • Painted wheels

For the painted wheels we suggested our stronger Brown Derby, but would have to be used carefully if used for the exhaust stacks if they are polished aluminum or chrome, to go with the White Lightning  or could instead try a Butyl degreaser like our Mighty Max both that would be safe for those surfaces . We also offered our spray  bottles of Stainless Steel Cleaner that also cleans polished aluminum and chrome.

They ordered samples of all three washes.

The testing went well and they followed up with two orders of larger sizes of washes plus tried the Stainless Steel Cleaner and samples of some interior detailing products.

Then came the last issue.

"Our trucks are primarily white with blue striping. We are having a hard time removing grease/dirt fingerprints from the roll-up doors. Do you have anything that may help?

We have tried, Blue Lightning, White Lightning, and Brown Derby, so far nothing is working.

We then sent them a sample of the Mighty Max Plus degreaser and that did not help. By their next email we were having a hard time understanding how none of the products they had tried was not removing greasy fingerprints and why would water delivery drivers have greasy hands? So we asked for photos B&A washing if possible of the fingerprints on the trucks and this is what we were showed;

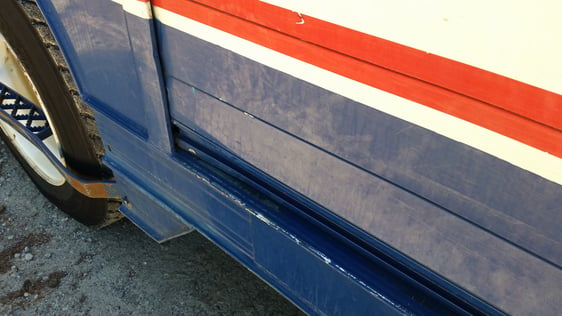
Diamondfingerprints.jpg

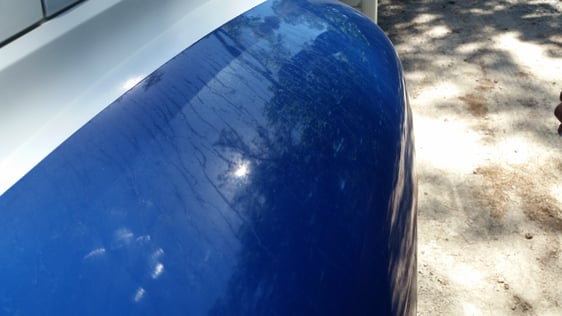
Now we had a better idea of what was going on, oxidation! The white and blue paint on these older units had lost all the protective coating and due to the UV rays had faded and was chalking out the paint. The drivers where putting their hands in the white paint chalk and redistributing it down into the blue painted areas. The white paint was also running down into the blue just from rain and daily moisture.

Normal truck washes can not help or cure this issue. High Alkaline washes actually allow the exposed failing paint to be loosened up even more, as the ingredients in them are what are used in most paint strippers.

The only course of action is to properly buff out and remove the oxidation, then once a new paint layer is exposed apply a long lasting protective sealing coat or wax or if not enough paint is left to have the vehicles completely repainted and sealed. Once that is done then using our safe finish wash products, like the White or Blue Lightning and wax, Spray Wax, will keep up and extend the life of the new paint finish.

In the photos they also included one of a newer truck with this issue, water streaking.

Diamondwaterspots.jpg

Here the issue was a much simpler one. Water trails and spots like this are usually caused by hard water, by the washer using too strong of a soap per water ratio allowing ingredient solids in the wash to deposit during drying or by letting the soap solution dry on the surface before proper rinsing.

The way to figure this out is to examine when this is happening. If the wash is not drying before rinsing, and the dilution ratios have been followed then the hardness of the water used to rinse or to mix up the concentrated product prior to or during washing must be considered the reason and checked out.

You can check for hard water by reading the water report of the water source, every year by law this information must be posted or given out when asked for. You can also buy and use hard water test strips or machines that can be bought commercially.

Hard water can be remedied by adding soft water additives like our So Soft to the water, or mechanical means by putting all water used though a softening system. Sheeting action products like our Quick Dry can also aid in allowing the rinse to not stand but bead up and fall off not allowing water with trace minerals from drying and creating spots and tracks on the painted surface.

We suggested they look into having these trucks with the failing paint professional buffed and waxed or sealed, or if possible a new paint job. That once this was done to continue to use our safe finish washes and spray wax to extend the life of the new finish and if they are having hard water issues to get some of our So Soft and or Quick Dry if they did not want to install a more permanent mechanical system fix.

and Future Plans

Diamond Springs Water answered that they agreed with our assessment of the problems and would try a few of our suggestions and would be ordering more soap again soon. Thanking us again for everything we had been helping them with over the last six months.

DiamondSpringsWaterDTsmall.jpg

Tags: Case Study

New Products this year

Posted by Linda Chambers on Thu, Feb 02, 2017 @ 12:06 PM

Here at GCE we have a number of new products already here or that will be coming soon.

First by customer request we added these first three products in January;

"Neutral Disinfectant Cleaner". So far we will have this in gallons only unless we get more requests for it in 5 gallons.

NeutralDisinfectant1gal.jpg The price per gallon is $20.00. This is an EPA registered product.

Next we got a true sanitizer, "Food Service Sanitizer". It is available in 1 and 5 gallon sizes.

FoodSanitizer1gal.jpgFoodServiceSanitizer5gal.jpg 1 gallons are $25.00 and 5 gallons are $120.00 and is also an EPA registered product.

For cleaning and polishing stainless steel in the kitchen or bathrooms we have "Stainless Steel Cleaner" that comes in a 16 oz trigger spray bottle for $12.00. It cleans and repels finger prints as well as general cleaning and polishing surfaces of stainless steel and polished aluminum.

We just got in this month a new restoration product, "Fire & Soot Remover".

FirenSootRemover.jpg

FIRE & SOOT REMOVER is designed for the removal of carbon soot stains on non-porous surfaces resulting from fire and smoke damage. It will also emulsify heavy grease, soap scum, rubber burns, floor finishes, black heel marks, dirt, printer ink, and carbon deposits. It has excellent cleaning capabilities even at extremely high dilution rates. It is nonflammable and contains no hard abrasives. We have gallons for $17.00 and 5 gallons for $68.00.

This Spring we will be adding a new product line to our store:

Seal n Lock, brick and paver sealer system.SealnLocklogo.png

Be looking out for the information about a local event we will be planing this Spring to introduce this system with an educational training day. It will be an all day Saturday event for no more than 30 attendees.

We are also working to host a training day for Ready Seal Stain wood stains and our EaCo Chem masonry products.

If there are any other products you are interest in GCE carrying, just contact me and let me know. When we get enough interest in a product we will try to get it into our store.


Tags: new product

How to use a Spill Kit

Posted by Linda Chambers on Wed, Jan 25, 2017 @ 10:27 AM

This is the last of my series on Spill Kits. I have told you why you need one, how to put together one your self and now we get to the part of actually using them.

Here are the steps you need to take when you see or are made aware of a chemical spill:

1. Is the spill still happening? Ex: a value is open and chemical is spilling out, a barel tipped over and contents still inside is still flowing. Safely stop the flow first. Put on gloves if needed and stop the flow.

2. Has someone been injured by the spill? If Yes open the nearest Spill Kit, put on PPE and remove the victim. If no victim or if someone else can handle their care go to the next step.

3. Determine what has spilled; look at the container it came from, look for labels. If you know what it is and what spill kit to use move on. If not then start with a Universal or General kit until you learn otherwise. If you can identify it but do not actually know how to handle this chemical, go get the SDS and check it for what PPE and clean up measures it tells you.

Types of Spill kits.png

4. Once you know what it is and which type of Spill Kit to use if you have not already needed to open the kit now and put out the safety measures to keep others out of and away from the spill. Enlist others to do this if possible so you can get right to the spill.

5. Put on all needed PPE if you haven't earlier. If the spill is large, and more than one set of PPE is included and someone else is available have them get ready to help you.

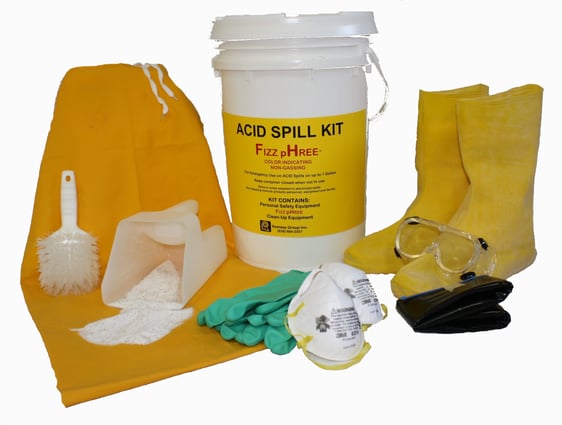
acid spill kit.jpg

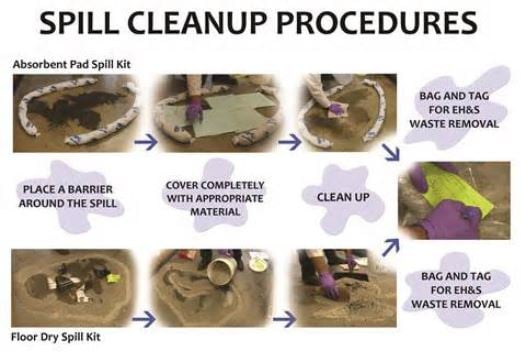
6. Contain the spill with supplied barriers; socks, booms, sand, drain covers, etc. Start with the highest hazard. ex: spill running toward a drain, electricity, road, stream, down a hill, etc. Choose the best route for cleanup according to the surroundings of the spill.

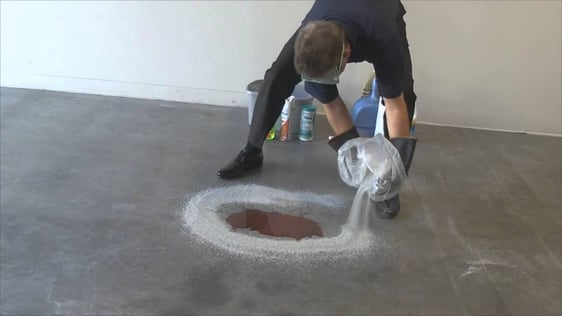
Using a spill kit.jpg

7. Once contained, meaning the spill can not get bigger, neutralize if needed. Ex: if it is an acid or corrosive. 

8. Once neutralized start to apply absorbent materials; pads, pillow, sand or other loose absorbents. Work from the outside edge inward. Continue until you have used enough to absorb all of the liquid or you have run out. If you have exhausted your supply and you still have a center of liquid move or put down barriers at the edge and start removing the absorbed materials while more supplies are found or until official first responders can get there.

Spillcleanupchart.jpg

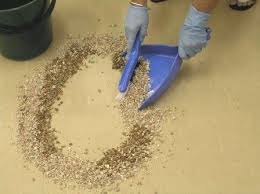
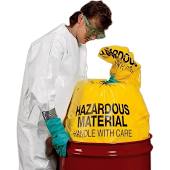
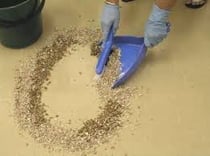
9. Clean up using broom and pan, shovel or other supplies and empty into a clearly marked as hazardous, approved container for removal; bags, bucket, pail, etc.

SweepUpSmall.jpgPuttingHWintobags.jpg

10. Clean spill area once cleared of spill with regular cleaning supplies; mop, neutral cleaner, sponges, etc. and discard them as well as they could still have traces of hazardous chemicals on them. You want to clean with a neutral cleaner so you don't have any chemical reactions with the residue from the spill.

11. Once cleaned and dry, remove all warning safety measures you had set out.

12. Immediately restock Spill Kit or replace with a new one until you can resupply.

Tags: safety, chemical safety, spill kit

DIY Spill Kits, all you need to know.

Posted by Linda Chambers on Wed, Jan 18, 2017 @ 12:42 PM

Any contractor that works with and transports hazardous chemicals needs to also have with each vehicle that contains these hazardous chemicals a chemical spill kit to comply with OSHA standards.

Most contractors are unaware that they need to have or how to use a spill kit. Just like many do not have or carry fire extinguishers. But OSHA has standards for the safety of the employees and the public at large when it pertains to hazardous chemicals.

I spoke in my last post on what OSHA says what a spill kit is and what has to be in a spill kit, and in fact they are pretty vague on a number of points but I will not go back over them, just please visit that post.

Now as I said in my last post you can buy ready made kits but I will show you how you can make your own DIY for many times much less and still be within the guidelines.

Here again is the list of required items for a spill kit:

A warning measure; A frame floor sign, caution tape, cones, etc.

PPE for at least one person effective to protect them from the spill during removal. Gloves, glasses or goggles, mask, shoe covers, etc

A physical barrier to place around the spill to contain it, which may or may not also absorb, OSHA does not say it has too. Can be berms, bumpers, drain covers, even sand.

Absorption materials; Sand, clay, pads, mats, etc.

Removal equipment; broom, shovel, waste pan or scoop

Removal containers; can be the spill kit container itself, bags or other approved container.

Products to clean the area once the spill has been removed. Such as a mop, cleaner, sponges.

And that is it.

If you can not reasonably carry a kit large enough to handle all the chemicals on your own you at least need to have available enough to lessen a spills impact before the proper first responders and hazdardous material removal teams can get there. 

This could include using materials to contain as much as possible, block or close off storm drains, prevent running across a road, traveling into a waterway, etc.

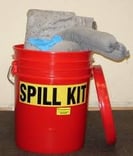
Here is what I bought and put into my own DIY 5 gallon spill kit:

I used a white cleaned out 5 gallon UN approvel pail. Make sure it only contained as near neutral a soap as possible but a pail from something else like a Firehouse Pickle pail can be fine too, plus it is already red, or an orange Home Depot pail.

I wanted my kit to supply two people to use as a Universal Kit that could take care of a 5 gallon size spill.

Here are items I picked up at the Dollar Tree: a bag of cat litter, pack of 5 puppy training pads, 2 pair of safety googles, a plastic dust pan with sweep brush, a small sqeege, pack of 8 Nitrile gloves, a red and white clothes line (to use to rope off spill area) Bright red tape, Heavy weight zip storage bags, a small bottle of Lysol disinfectant cleaner, a pack of 6 absorbant pads. $11.00
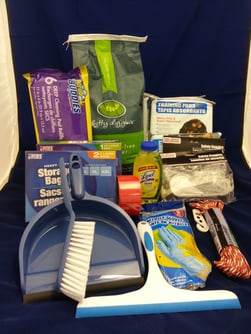
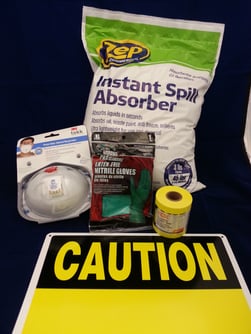
2015-03-18 11.12.14.jpg2015-03-18 11.24.38.jpg

A stop at a Dollar Store for large sponges and zip ties, $4.00+ some change.

Then I went to Home Depot and got:

A two pack of N95 masks, a roll of caution tape, a caution sign (to hang on the rope), one pair of heavier Nitrile gloves if needed, and a 3 lb bag of Zep instant spill absorber and one bag of play sand. This was my most expensive stop and not all of the supplies are all going in. $32.00

Plus a few items I had lying around the house so they were at no cost. Total still under $50 unless you have to buy the pail, which I did not.

Here is how I put it together:

Got the pail clean and ready by labeling for the type, Universal and amount of chemical it should treat, 5 gallons.

Put the items you will use last in the bottom, fill up until what you will need first on top. 

So cleaning items in first: Lysol, sponges.

Then the disposal items: marked hazardous bags, extra zip ties.

The disposal removal items: broom and pan

The absorbant materials: the pupply pads, cat litter I had poured into an empty quart milk jug and marked with permanent marker, 2 Heavy zip bags filled with the Zep absorbor material about 1 lb each. 

Containment materials; Two homemade berm socks made from the cut off legs of a pair of knit tights fiiled with sand and tied closed. And another quart milk jug filled with more loose sand to use if the socks are not enough.

PPE next: Masks, Gloves and goggles all in their own baggies so you open only what you need.

Warning measures on top: Sign, caution tape and rope.

And that completes the kit.

If you would like a copy of my e-book How to make your own OSHA Spill Kit, email me at lchambers@georgiachemical.com

Next Post: How to use the kit to clean up a spill.
 

Tags: chemical safety, spill kit

Spill kits, what they are and do you need them?

Posted by Linda Chambers on Wed, Jan 11, 2017 @ 08:30 AM

For my next safety blog to start of the new year I will talk about needing and then making a spill kit.

I have been asked many times by contractors, "Do I really need a spill kit? I one word, Yes. OSHA requries you as a contractor working out in the public to be responsible for the health and safety of your employees and the public at large while you are working while you are handling and working with hazardous materials. And unless you know for sure and can prove that non of the products you use to clean with are hazardous then I would plan on carrying a spill kit when ever you are transporting and using chemicals. 

To know what type and how large of a kit you will need you will first have to know what chemicals you are carrying at any given time, how these chemicals may react under multiple conditions and with each other if a spill was to occur.

Spill-kit-bucket.jpgAccidentSpillKevin Stokes2.jpgSweepUpSmall.jpg

According to OSHA; "A spill kit is a collection of items to be used in the immediate response and clean-up of spills, leaks or other discharges of hazardous wastes or other hazardous materials" (chemicals, gas, etc.). "Spill kits should be maintained in close proximity to areas where chemicals are managed or stored to enable prompt response to and clean-up of spills."

Spill kits will come in various sizes and types and a few are those that can handle anything. To know what you will need you first need to check your SDS's for all of the chemicals you use. Then from this information that will determain what kits you will need.

Here are the different types of kits:

Universal or General - These handle most non hazardous, non acid spills and as long as the kit is made to handle the volume of the spill, this in the type everyone needs to carry with any vehicle that transports chemicals. Even if non hazardous it is a good idea to be able to handle a spill on your own. 

Types of Spill kits.png

Oil-Only - Contains absorbent materials made for oils not water. (photo)

HazMat - These contain specialized PPE, absorption materials and removal devices above what a general kit would contain.

acid spill kit.jpgCalgonite spill kit.png

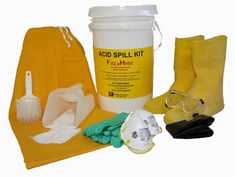
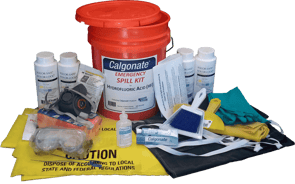
Acid -  Is a type of HazMat kit. These contain specialized PPE, neutralization and adsorption materials in addition to specialized removal containers. Note: Some acid kits are not made to handle hydrofluoric acid so make sure of the neutralizer you get. I recommend Spill-X-A or Calgonate.

OSHA guidelines lists the equipment types that must be in a spill kit: Proper PPE, materials to contain the spill and the materials needed to clean up and remove the spill.

Here is what normally needs to be in any spill kit:

Labeling on outside of the kit container, stating what type of spill kit it is, it may also state the size spill it covers but is not required.

A warning measure, to keep others away from the spill until removed, examples are;

            A-frame floor sign        

            Roll of caution tape

            Hazard cones

PPE, personal protection equipment to use while removing the spill;

            Gloves - hand protection - minimum  

            Eye wear - eye protection - minimum

            Mask - lung protection if needed

            Shoe covers - foot protection if needed

            Can include more when needed for type of spill example; a full face respirator.

Physical barriers to place around the spill used to contain which may not absorb the spill;

            Berm, bumper, sock  

            Drain covers or plugs, to keep spill out of drains and pipes. 

Absorption materials;

            Sand, clay, pads, or other materials to soak up the spill

Removal Items; Broom and pan or shovel, to collect loose soiled material for removal 

Removal containers;

            Bags, or other container that can be sealed to remove spill waste.

The size of the kit can vary as well. Always try to have and use a kit made to handle more chemical than you have spilled, but if you can not, try to limit or contain the spill with the materials you do have on hand. For instance if the only thing you can do is lessen a spills impact by blocking a storm drain, stopping it from travelling down hill or out into a street, do that until additional help arrives, like the fire department. Additional spill kits or other materials can be brought to the contained spill for removal as soon as possible by the first respondors.

There is one big point to this post that you do not have to buy a pre-made kit and there is no such thing as OSHA approved so do not fall for that sales trick. OSHA does not certify any specific brand of kits. But a kit may say conforms to OSHA requirements or be called an OSHA spill kit. But you can make one yourself some times at a much lower cost. That I will cover in next weeks post.

Tags: safety, chemicals, spill kits

Build your own First Aid Kit

Posted by Linda Chambers on Wed, Jan 04, 2017 @ 03:02 PM

At the beginning of a new year is a great time to go over equipment and safety items to be sure things will stay working right and that you will have what you need when that need arises.

So with that in mind for the next few weeks I will be going over these types of issues.

FirstAidKit.jpg

This week I will cover first aid kits. If you do not already have one, GET ONE. And for many of you that will mean having more than one. And as contractors, handling machines and chemicals everyday, the run of the mill buy off the store shelf, single person first aid kit is not going to cut it. Not even some of the made for companies kits from places like Uline will be perfect.

I will list for you things that should be in your contractor first aid kit for every 1-10 persons it will be expected to cover and with each additional 5-10 just do the multiplication yourself to up the numbers you need to have on hand.

One mistake many people make with a kit is to just toss in boxes of items from a store which can just over fill the space in the kit so that you stop putting in things you may really need to have with you. It is much better to have small amounts of a number of different items then a box of 250 band-aids! I suggest you go and buy a box or two of clear industrial grade zip bags in small sizes to put your supplies in, (3x4, 2x4), from a company like Uline. This way the contents will be protected, easy to see to find what is needed and you can store only what you need, taking up less space. But if not, using a box of zip lock snack bags can work. Buy medicaitions in individual dose packages if possible.

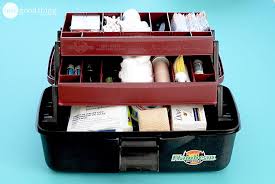
The size of the kit itself can vary depending on how many people you will need to cover so I suggest you gather the contents first and then find the container it will all fit in rather than buying a general kit and trying to stuff in the extra items that we are suggesting you should carry. I like hard sided cases vs. soft, to be more water proof and damage resistant. And my all time favorite is a DIY tackle box converted to a First Aid Kit. The only thing I would change with the one pictured is that the contents be in baggies so they stay clean and dry out in the field.

tackleboxfirstaidkit.jpg

You need to cover the OSHA and ANSI standards for what should be in an employee first aid kit and build up from there. Here is the current ANSI requirements that covers 10 employees:

ANSI Z308.1-1998 – Minimum requirements for workplace first aid kits

Item                                                                                                 Minimum Qty

Absorbent compress, 32 sq. in. (81.3 sq. cm.) no side under 4 in.           1

Adhesive bandages, 1x3 in (2.5 cm x 7.5 cm)                                          16

Adhesive tape, 5 yd. (457.2 cm) total                                                        1

Antiseptic, 0.5g (0.14 fl oz.) / application                                                  10

Burn treatment, 0.5g (0.14 fl oz.) / application                                          6

Medical exam gloves                                                                            2 pair

Sterile pads, 3 in. x 3 in. (7.5 x 7.5 cm)                                                     4

Triangluar bandage, 40 in. x 40 in. x 56 in. (101cmx101cmx142cm)        1

First Aid guide                                                                                           1


Here is my list to add to the basics:

1 Pair of medical bandage sissors

1 pair Splinter Forceps


5 each - Fabric elastic adhesive band-aids in multiple sizes; 1x3, knukle, butterfly, fingertip.

1 Roll Gauze 2 in. x 4 yd.

1 Ace elastic bandage wrap 3 in x 5 yd.

2 pair Nitrile gloves 

1 Instant Cold pack 4x5 in.

1 Instant Hot compress 5x9 in.

1 tube of Insect bite ointment, spray or 6 wipes/towelettes

1 tube of Triple Antibiotic Ointment 1 oz. minimum

1 Bacitracin 1 oz.

1 finger splint

1 Bottle eye drops (for minor irritation or allergy) 0.5 oz.

1 eye wash 4 oz. (for emergency eye flushing)

1 Calgonate eye wash 4 oz. (If you use any amount of Hydroflouric Acid products)

2 eye pads/patches

12 doses Acetaminophen 500 mg. (can be packs of two or a small bottle of 24 pills)

12 doses Allergy tablets, Diphenhydramine HCL 25 mg.

6 cough drops

1 small bottle of Tums or antacid tablets

1 CPR shield/mask


1 digital thermometer

1 penlight

1 Emergency blanket

1 25g Tube Calgonate gel (If you use any amount of Hydroflouric Acid products)


There are other things that may come in handy you might want to include like blood clot powder or wound seal, or an elastic knee and elbow brace. Of course if you end up using anything out of the kit it should be replaced immediately upon returning to the shop, your office or home. Keep an inventory list in the kit and check it at least once a month to be sure it is complete. Having a different person do this at each of your monthly safety meetings is a good idea as it also gets each employee accustom to what is in the kit and where to find it. Something that could be needed with minutes count.

Here are a few places you can shop for supplies;

https://www.e-firstaidsupplies.com/

http://www.zeemedical.com/us/first-aid-supplies

https://www.masune.com/service/faq.asp


Sign up for Newsletter by Email

Latest Posts

Posts by category